Dashboard Management
Default ThreatQ Role: Administrative, Maintenance, or Primary Contributor
Custom Role - Action Permissions: Artifact Management - Dashboards
Access to dashboards is determined by your user role and Sharing permission level.
Accessing a Dashboard
If your dashboard view includes more tabs than can be displayed in a single screen, the left and right arrows on the right side of the screen allow you to scroll through the list of dashboard tabs.

You can access a specific custom dashboard using the following methods:
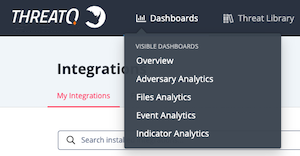
- Click the Dashboards link in the top navigation and select a dashboard from the dropdown menu.

- If you are not viewing a dashboard at the time, you can click on the ThreatQ logo to load your default dashboard.
After you select a dashboard, you can click the ![]() icon next to the dashboard name to view:
icon next to the dashboard name to view:
- Dashboard owner
- Date and time of the last change to the dashboard

Add an Existing Dashboard to Your View
You can customize your dashboard view by adding a dashboard you created, a default dashboard, or a dashboard shared with you by another user.
- Navigate to the ThreatQ landing page.
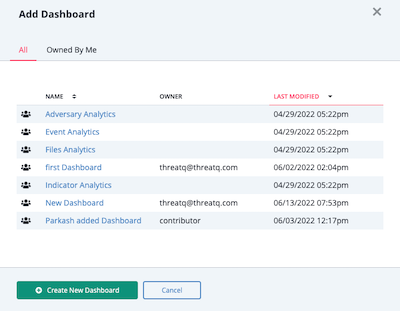
- Click the Add Dashboard link.
The Add Dashboard window displays an All and an Owned By Me tab. The All tab lists all of the dashboards you have access to including default, shared, and owned dashboards. The Owned By Me tab lists only the dashboards for which you are designated as the owner.If you are a read-only user or do not own any dashboards, the Owned By Me tab is grayed out and inactive.

- Click the dashboard you want to add to your view.
Creating a Dashboard
All User Roles, except Read-Only Access can create custom dashboards.
- Navigate to the ThreatQ landing page.
- Click one of the following options:
- Create New Dashboard - If your view includes all the dashboards that you created and that are shared with you, click this link to begin creating a new dashboard.
- Add Dashboard - If your view does not include all of the dashboards you created or that are shared with you, click this link to access the Add Dashboard window and then click the Create New Dashboard button.
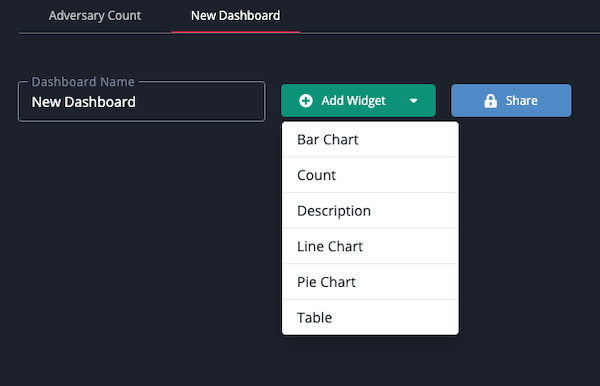
- Enter the Dashboard Name.

- Click the Add Widget button and select the type of widget to add.

- After adding a widget, you can resize it by clicking and dragging the mouse on the bottom-right grey corner.
- You can move the widget around the dashboard by clicking the widget header and dragging it around the page.
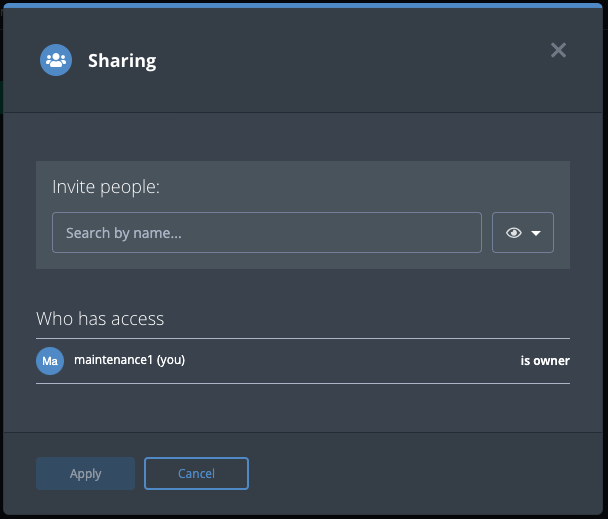
- Click on the Share button and specify user access to the dashboard. See the Dashboard Sharing topic for more details.

- Click the Done Editing button to save the dashboard.
Editing a Dashboard
You can only edit a Dashboard for which you have owner or editor permissions.
- Switch to the custom dashboard you want to edit.
- Click the Edit button.
- You can click the gear
 icon in the header of a widget to edit individual widget settings. You can click the delete
  icon to delete the widget.
If you add and save a new widget that references a data collection, all users who have access to the dashboard are also granted viewing access to the data collection.
- After you make your changes, click the Done Editing button to save all updates.
Deleting a Dashboard
This action will delete the dashboard from the platform. You can also remove a dashboard from your view without completely deleting it from the platform. See the User View Management topic for more details.
You cannot delete the default system dashboard or dashboards created by other users.
- Switch to the custom dashboard you want to delete.
- Click the Edit Dashboard button.
- Click the red delete icon next to the Done Editing button.
- Confirm the deletion by clicking the Delete Dashboard button in the Are you sure? window.
Reassigning a Dashboard of a Deleted User
When you delete a user, you must reassign ownership of his dashboards or they will be automatically deleted with his account. See the Managing User Accounts topic for more details.