About Relationships Panes
Default ThreatQ Role: Administrative, Maintenance, or Primary Contributor
Custom Role - Action Permissions: Objects & Context - Individual Object Context & Actions - Relationships
The Relationship section of the object details page displays other system objects that have been related to the current object.
From this pane, you can:
- Link/unlink system objects.
- Perform bulk updates (related indicators pane only).
- Select the columns to be displayed for the object type.
- Click on a related object to navigate to its object details page.
Certain related system objects, such as related indicators, will have additional actions available. See the Additional Related Object Actions topic.
You cannot add an investigation as a related object.
Linking a System Object
- Locate the desired system object type pane on the object details page.
Relationships panes will only appear if a system object is already related to the object. Use the Actions button to relate the initial object: Actions > Add Relationship.
- Select the
 icon.
icon.
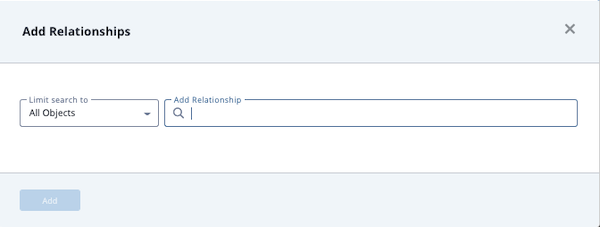
The Add Relationships dialog box opens.

- Use one of the following methods to add an object to the Add Relationships field:
- For existing objects, enter the object name and select the match from the down list.
Repeat this step to add multiple objects.
- To create a new object, enter the new object name. The, click the Create link to add the new object to Threat Library. If you limited your search to a specific object type, you are linked to the corresponding form. For example, if you limited your search to Adversaries, the Create link opens the Add An Adversary form. If you left the Limit search to field set to All Objects, you can select the object type you want to create from a drop-down list.
- For existing objects, enter the object name and select the match from the down list.
- Click Add.
Unlinking a System Object
- Locate the Related <System Object> pane on the object's details page.
- Select the checkbox(es) next to the system objects to unlink.
- Select the
 icon.
icon.
Selecting Columns by Object Type
You can choose the columns displayed for each related object type except for File objects. When you add a column, it is displayed to the left of the Linked By, Confidence, and Comments columns. For Maintenance and Admin users, ThreatQ retains column selections by login and applies the selections to all objects of the same object type. For example, if you select the Last Modified column for Adversary1, you will see the same column displayed for all adversaries. Read Only and Primary Contributor users can select columns for display. However, their selections are not saved.
For each related object type, ThreatQ specifies default and required columns. You can remove default columns from your view but you cannot remove required columns.
| Object Type | Default Columns | Required Columns |
|---|---|---|
| Adversaries |
|
|
| Assets |
|
|
| Attack Pattern |
|
|
| Campaign |
|
|
| Course of Action |
|
|
| Events |
|
|
| Exploit Target |
|
|
| Files |
|
|
| Identity |
|
|
| Incident |
|
|
| Indicators |
|
|
| Intrusion Set |
|
|
| Malware |
|
|
| Report |
|
|
| Signatures |
|
|
| Tasks |
|
|
| Tool |
|
|
| TTP |
|
|
| Vulnerability |
|
- Locate the Related <System Object> pane on the object's details page.
- Click the column button next to the Unlink option.
- Use one of the following methods to locate the columns you want to display/hide:
- Scroll through the list of column options.
- Begin typing the column name until it is displayed below the search field.
- To display a column, check the checkbox next to the column name.
- To hide a column, uncheck the checkbox next to the column name.