Bulk Actions
Default ThreatQ Role: Administrative, Maintenance, or Primary Contributor
Custom Role - Action Permissions: See the Interdependent Permissions topic.
The Bulk Actions feature gives you the ability to update and delete large groups (1000+) of system objects. Once selected, the job process runs in the background and allows you to continue working within ThreatQ. You can review the status of the job and its results on the Job Management page.
The fields listed in the Bulk Actions Bulk Change form may differ based on the type of system objects you have selected. Example: If you selected a set of events, the Change Expiration options will not be listed as expiration pertains to indicators only.
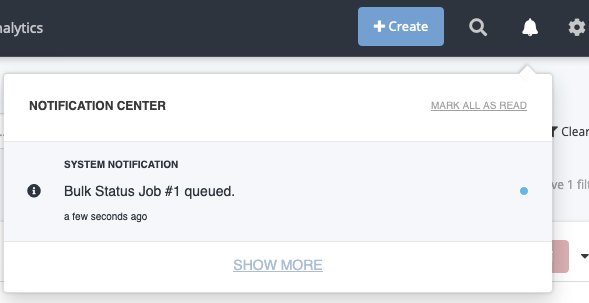
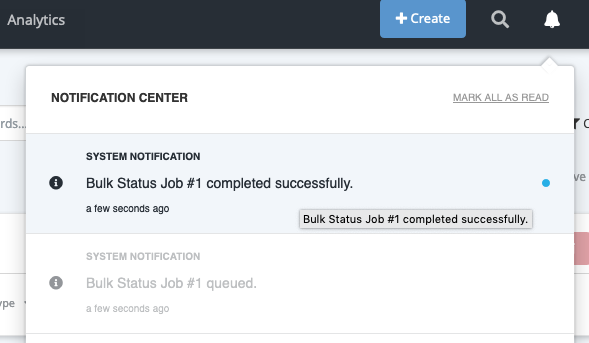
Upon initiating a Bulk Action, the job is queued by the system and you receive an in-app notification via the Notification Center icon. The system also notifies you, via the Notification Center, that the job has been completed.
Bulk Add Source
If an object is already associated with the source selected for the Bulk Add Sources action, the object is skipped during the bulk process.
- Perform a search on the Threat Library.
- Click the Bulk Actions button
 .
.
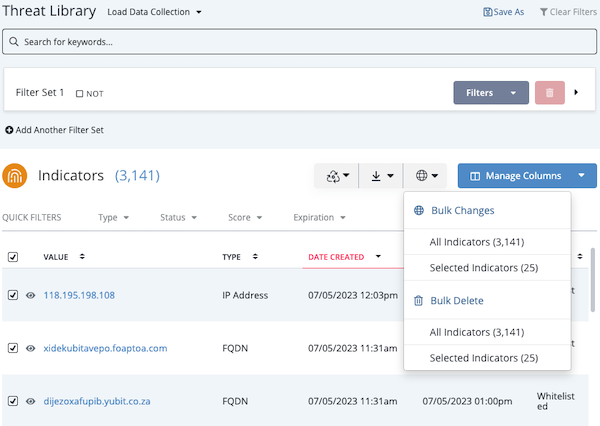
- Click the All <System Object> or Selected <System Object> option under the Bulk Changes heading.
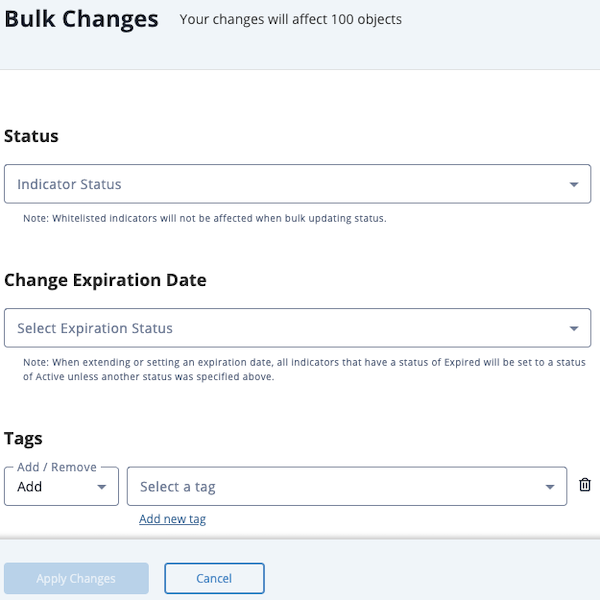
- Click Add Row under the Source heading.
A new row with a dropdown option is displayed.

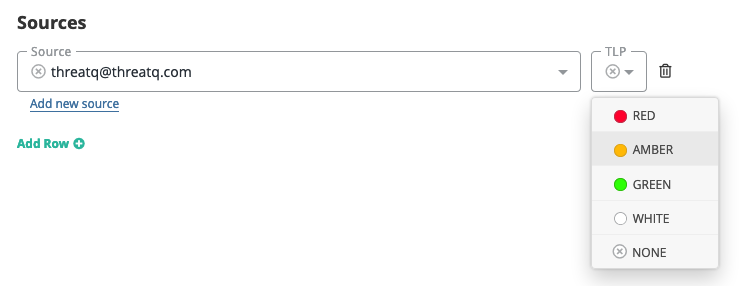
- Use the dropdown to select the source to add to the selected objects. You can also use the Add New Source link to add a source that is not listed in the dropdown.
If you have TLP enabled, you will also be able to update the designation for the source selected or keep the source-default designation.
Bulk Add/Remove Attributes
- Perform a search on the Threat Library.
- Click the Bulk Actions button
 .
.

- Click the All <System Object> or Selected <System Object> option under the Bulk Changes heading.
The Bulk Changes page is displayed.

Only the Bulk Actions that relate to the type of system object you selected will load on the Bulk Changes form.
- Locate the Attributes heading and select either Add or Remove.
- Select the attribute Name and Value. You can also use the Add New Name and Add New Value options to create new attributes. If you are adding an attribute, you will also select a Source. If you do not select a Source, the Source default will automatically be used.


Click Add Row and repeat steps 4-5 to add/remove multiple attributes. See the Scenarios section below for more details.
- Click the Apply Changes button located at the bottom of the form.
Bulk Add/Remove Attribute Scenarios
Add Multiple AttributesAdd Multiple Attributes
- The user narrows down the Threat Library using advanced search filters.
- The user selects Bulk Changes from the Actions dropdown.
- The user enters the Attribute Name, Value, and Source for the first row in the Attributes section.
- The user clicks on Add Row.
- The user enters the Attribute Name, Value, and Source for the new row.
- The user clicks on Apply Changes.
Results
- All objects with in the list will have those attributes added
The attributes will be listed in the audit log mentioning that this. The author of the action will be "Job ID <job_id_number> (<username>)"
Remove Multiple AttributesRemove Multiple Attributes
- The user narrows down the Threat Library using advanced search filters.
- The user selects Bulk Changes from the Actions dropdown.
- The user selects Remove from the dropdown in the Attributes section and then enters the Attribute Name, Value, and Source for the first row.
- The user clicks on Add Row.
- The user selects Remove from the dropdown and then enters the Attribute Name, Value, and Source for the second row.
- The user clicks on Apply Changes.
Results
- All objects in that change set that have the attributes specified (exact Name, Value, Source) will have them removed
The attributes will be listed in the audit log mentioning that this. The author of the action will be "Job ID <job_id_number> (<username>)"
- Any object that does not have the attributes specified (exact Name, Value, Source) will be skipped.
There will be no mentions of the job in the audit log for those objects because no changes were made.
- All objects in that change set that have the attributes specified (exact Name, Value, Source) will have them removed
Add and Remove AttributesAdd and Remove Attributes
In this scenario, the platform will execute the Bulk Changes in the following order:
- Add Attributes - See the Add Multiple Attributes Scenario above.
- Remove Attributes - See the Remove Multiple Attributes Scenario above.
Bulk Add/Remove Tags
- Perform a search on the Threat Library.
- Click the Bulk Actions button
 .
.

- Click the All <System Object> or Selected <System Object> option under the Bulk Changes heading.
The Bulk Changes page is displayed.

- Select whether either the Add or Remove function and the Tag. You can also use the Add New Tag option if the desired tag is not listed in the dropdown.

Click on Add Row and repeat step 3 to add/remove multiple tags.
- Click the Apply Changes button located at the bottom of the form.
Bulk Change Expiration Date
This function can only be performed on Indicators.
- Perform a search on the Threat Library.
- Click the Bulk Actions button
 .
.

- Click the All <System Object> or Selected <System Object> option under the Bulk Changes heading.
The Bulk Changes page is displayed.

- Select the type of expiration update to perform:
See the Bulk Change Expiration Date Scenarios topic for specific details and outcomes.
- Extend expiration date
The platform will ask you for the number of days to extend the expiration upon selection.
- >Protect from auto-expiration
- Remove expiration date
- Set a new expiration date
The platform will ask you to select a new date using a date picker upon selection.
- Extend expiration date
- Click the Apply Changes button located at the bottom of the form.
Bulk Expiration Change Scenarios
- The user attempts to make bulk expiration changes to system objects other than indicators.
- The Change Expiration Date option will not be listed on the Bulk Changes form.
Setting Expiration policy to a specific daySetting Expiration policy to a specific day
- The user selects a set of indicators using the advanced search.
- The user selects Set a New Expiration Date from the Change Expiration option.
- The users selects a day using the date picker.
The date selected must be a future date.
- After submitting the request, all indicators as part of that record set have the new expiration date.
- The user selects a set of indicators using the advanced search.
- The user selects Extend Expiration Date from the Change Expiration option.
- The user enters the number of days to extend.
- After submitting the request, all indicators in that record set will now have their expiration date extended by that number of days specified.
Remove an expiration policyRemove an expiration policy
- The user selects a set of indicators using the advanced search.
- The user selects Remove Expiration Date from the Change Expiration option.
- After submitting the request, all indicators in that record set will no longer have an expiration date.
Protecting items from auto-expirationProtecting items from auto-expiration
- The user selects a set of indicators using the advanced search.
- The user selects Protect from Auto-Expiration from the Change Expiration option.
- After submitting the request, all indicators in that record set will have the protect from auto-expiration expiration policy applied.
- The user selects a set of expired indicators using the advanced search.
- The user selects Set a New Expiration Date from the Change Expiration option.
- The users selects a day using the date picker.
The date selected must be a future date.
- After submitting the request, the expired indicators in that record set are then changed to a status of Active and the expiration date is set to the date indicated with the date picker.
All whitelisted indicators included in a Expiration Change set will be skipped.
- The user selects a set of expired indicators using the advanced search.
- The user selects Remove Expiration Date from the Change Expiration option.
- The expired indicators in the set are skipped.
Bulk Delete
The Bulk Delete feature offers users with Maintenance and Administrative roles the ability to select and delete system objects of all types, excluding Files and Tasks, from the Advanced Search page. In addition to the system object, bulk delete will also delete all child records such as attributes and relationships.
Individual Tasks and Files can be deleted by accessing the object’s details page and selecting Delete Task/File from the Actions menu.
Once selected, the job process will run in the background and allow you to continue working within ThreatQ. An in-app notification will alert you when a Bulk Delete job has been queued and when it has been completed. You can also view the status and outcome of the job from the Job Management page.
The Bulk Delete function permanently deletes selected indicators from the system. Once deleted, you will be unable to undo the action. If you are executing a Bulk Delete on a large group of indicators, ThreatQuotient highly recommends performing a backup of your system before performing this function.
Based on the size of your bulk delete job and the system resources available, you may find that the estimated job duration is quite long. In these rare instances, contact ThreatQ support to explore your other options for deleting a large number of objects.
- Perform a search on the Threat Library.
- Click the Bulk Actions button
 .
. - Click the All <System Object> option under the Bulk Delete heading.
The Bulk Action Confirmation dialog box will load.
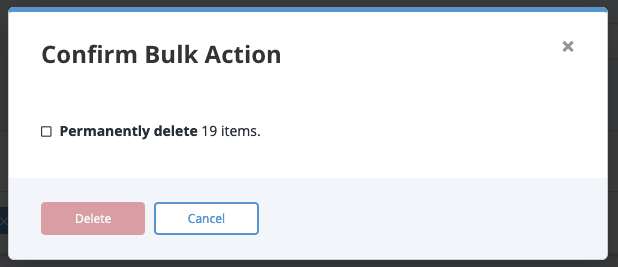
- Click the checkbox to confirm deletion and then click the Delete button.
Bulk Add/Remove Relationships
You can use the Bulk Change option to add/remove relationships for a group of objects, per object type, on the Advanced Search page. Bulk relationship updates are restricted to less than ten thousand objects and up to ten relationships per batch.
If an object is already associated with the source selected for the Bulk Add Relationships action, the object will be skipped during the bulk process.
- Perform a search on the Threat Library.
- Click the Bulk Actions button
 .
. - Click the All <System Object> or Selected <System Object> option under the Bulk Changes heading.
The Bulk Changes page is displayed.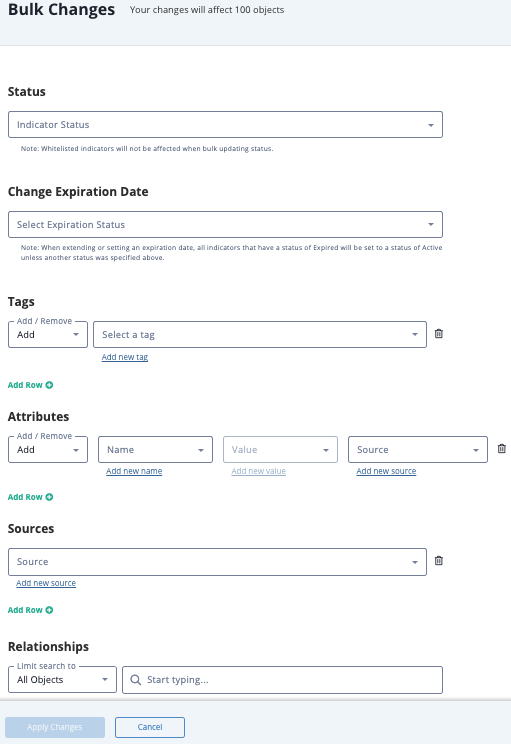
Only the Bulk Actions that relate to the type of system object you selected will load on the Bulk Changes form. Example: Bulk Expiration Change will not load for non-indicators.
-
Locate the Relationships heading and optionally select Limit Search To to select an object type.

- Enter an object name.
By default, this field searches for objects that begin with the search string you enter. To search for objects that include your search string but do not begin with it, you must use a wildcard (% OR *) search.
Examples:
1. When you enter "us", your search returns USBferry and USBStealer.
2. When you enter "%us" or "*us", your search returns Aquarius, Lazarus Group, Dust Storm, USBferry, and USBStealer. -
After you select an object, the Add/Remove option appears.

- Select either Add or Remove.
- Use the dropdown to select the source to add to the selected objects. You can also use the Add New Source link to add a source that is not listed in the dropdown.
- Click the Apply Changes button located at the bottom of the form.
Bulk Status Change
This function can only be performed on objects that use the status field such as Indicators, Events, Signatures, custom objects, etc.
Whitelisted Indicators are not affected by Bulk Status Change. If a Whitelisted Indicator is included in the set of system objects selected for a Bulk Status Change, the platform will skip the object without making a status change.
- Perform a search on the Threat Library.
- Click the Bulk Actions button
 .
. - Click the All <System Object> or Selected <System Object> option under the Bulk Changes heading.
The Bulk Changes page is displayed.
- Use the dropdown provided to select a new status to be applied to the selected objects.
If you no status types are configured for an object, the Status field is not displayed.
For Event and custom objects, you can select the None option to remove the statuses assigned to the objects.
- Click on Apply Changes button located at the bottom of the form.