Importing Indicators via CSV
Default ThreatQ Role: Administrative, Maintenance, or Primary Contributor
Custom Role - Action Permissions: Objects & Context - Perform Bulk Manual Import, Create, Edit, Delete Objects, Create, Edit, Delete Attributes, Create, Edit, Delete Relationships. See the Interdependent Permissions topic.
Note: If a user has View Only permission for Sources, system object parsers default to the user’s login as the object source.
You can parse a CSV file for indicators using the ThreatQ CSV File Parser.
A CSV example file is available for download to serve a reference as you build your own CSV.
Download CSV Example
CSV Files with 1000+ Rows
- Attempt to break the file into smaller parts and import.
- If you cannot break down the file, contact ThreatQ Customer Success about implementing a dedicated parser using the Configuration Driven Feed (CDF) framework.
CSV Columns
The column headers marked with an * in the table below are required for the CSV file. Failure to include these required columns will result in the import process failing. All other column headers are optional and will not cause the import process to fail if not included.
Object and Attribute Sources cannot be added through the CSV file itself. A source value is added in the Step 7 of the import process, listed below, and is selected by the user.
The ThreatQ parser is case sensitive. When creating your CSV file, confirm that you are using the correct spelling and case for column headers as listed below.
| Column header | Details |
|---|---|
| *Indicator | This field identifies the indicator name/value. ThreatQ requires that the Indicator column be included in the CSV file and that each entry have a value. Example 
|
| *Type | This field identifies the indicator type. ThreatQ requires that the Type column be included in the CSV file and that each entry have a value. You must use a type that already exists in your ThreatQ instance. If you are unable to provide an Indicator Type for each indicator, you can use the Generic Text/PDF parsing option that attempta to identify indicator type values automatically. Example
|
| *Status | The Status column is required. You must use a status that already exists in your ThreatQ instance. You can review your existing status by clicking on the Settings gear icon and selecting Object Management.
The status supplied in the CSV overrides the status selected during the import process. Example
|
| Attribute | The Attribute columns are optional. You can apply one or more attributes to an indicator by adding an Attribute column. Attribute keys are case and space sensitive, ‘MalwareFamily’ and ‘malware family’ will generate a separate key in ThreatQ. In order to map to an existing Attribute Key in ThreatQ, you must match it exactly. Each attribute column heading must use the follow format: Attribute::<Attribute Name>
ThreatQuotient recommends you review existing attribute keys and values in ThreatQ prior to importing so that you can maintain consistent and normalized attribute data. Example
|
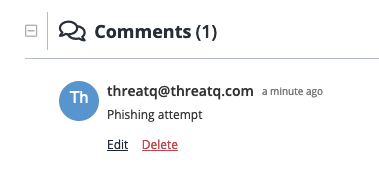
| Comments | The optional Comments column allows you to add a comment for the indicator. The ThreatQ user that performs the import process is marked as the author of the comment in ThreatQ.  Example 
|
Parsing a ThreatQ CSV File and Adding Context
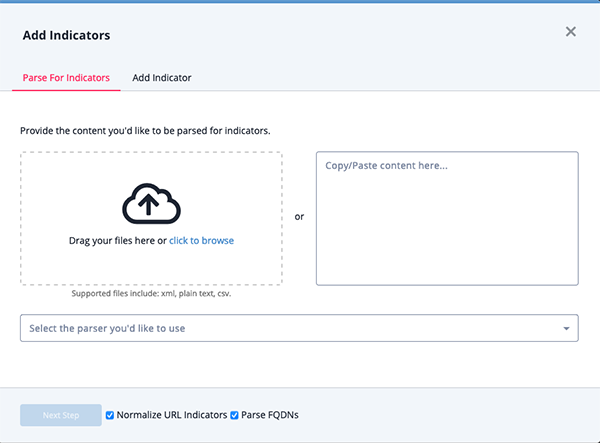
- Click the Create button and select Indicator Parser under the Import heading.
The Add Indicators dialog box opens with the Parse for Indicators tab selected.

- Upload your CSV file by either:
- Dragging and dropping your file into the window
- Clicking the Click to Browse option and uploading your file
- Select ThreatQ CSV File as the parser to use.
- Use the checkboxes to select your parsing options:
Option Description Normalize URL Indicators When checked, parsed URLs will have ports and leading protocol adjusted, as well as unneeded quotes and spaces removed. Query strings will also be removed when URL normalization is enabled.
See the Indicator URL Normalization topic for more details.
Parse FQDNs When checked, the Indicator Parser will parse FQDNs from the text and derive FQDN indicators from URLs in the text. Example (checked): URL: https://tqexample.com/table.jspa?query_string_example
Indicators created:
- tqexample.com/table.jspa (the URL)
- tqexample.com (the derived FQDN from the URL)
When unchecked, the Indicator Parser will not generate FQDN indicators from the parsed text.
Example (unchecked): URL: https://tqexample.com/table.jspa?query_string_example
Indicator created:
-
tqexample.com/table.jspa (the URL)
Administrators can configure the default setting for these options under the General Tab on the System Configurations page. See the Indicator Parsing Presets topic for more details.
- Click Next Step.
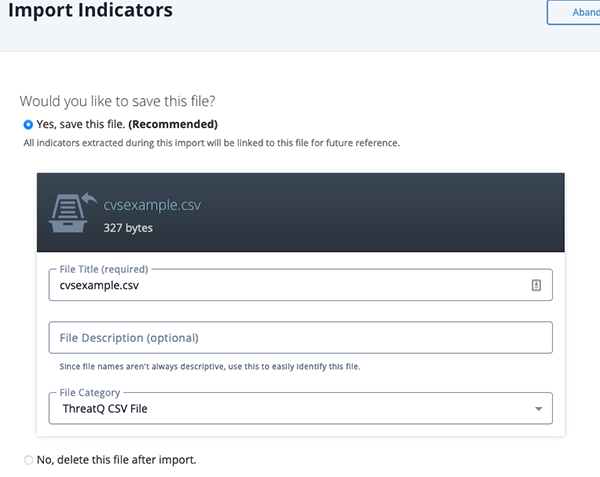
- Select whether or not to save the CSV file. Saving the file will result in all extracted indicators being linked to the file for reference.

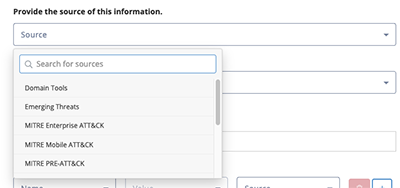
- Select a Source for the extracted indicators.
You can also click the Add a New Source option if the desired source is not listed in the dropdown list . If administrators have enabled TLP view settings, you can select a TLP label for the new source in the dropdown list provided. See the Traffic Light Protocol (TLP) topic for more information on TLP schema.

- Select a Status for the extracted indicators. The indicator's Status value supplied in the CSV overrides this value.

- Enter any Tags to apply to the extracted indicators. This field is optional.
- Select any attribute, attribute value, and attribute source to apply to the extracted indicators.
- Add Relationships for the extracted indicators.
If you enter an object name that is not found, you can click the Create link to add the new object. If you limited your search to a specific object type, you are linked to the corresponding form. For example, if you limit your search to Adversaries, the Create link opens the Add An Adversary form. If you leave the Limit search to field set to All Objects, you can select the object type you want to create from a drop-down list.
- Click on Next Step.
The Step 2: Organize and Classify page will load.

- You can review the extracted indicators' information and attributes.
You can perform the following actions:Action Details Add Indicator You can add additional indicators by clicking on the Add Indicator button. Edit Indicator Type and Value You can edit the Indicator Type by clicking on the Pencil icon next to the indicator name. The Edit Indicator screen will load. You can edit the extracted indicator's value and type from this box. Set/Update Status You can update the status of one or more extracted indicators. Select the checkbox next to the indicator(s) to update and then click on the Add Info option. Click on the Set Status tab and select your new status. Add Attribute You can add an attribute to one or more extracted indicators. Select the checkbox next to the indicator(s) to update and then click on the Add Info option. The Add Attributes tab will be selected by default. Select an Attribute Name, Value, and Source to apply to the selected indicator(s). Create Relationship You can link one or more extracted indicators to another system object. Select the checkbox next to the indicator(s) to update and then click on the Add Info option. Click on the Set Relationship tab and set the relationship. When you add a relationship, it is displayed in the indicator list and you can click it to view its details in a preview panel. If the object you want to link is not found, you can you can click the Create link to add the new object. If you limited your search to a specific object type, you are linked to the corresponding form. For example, if you limited your search to Adversaries, the Create link opens the Add An Adversary form. If you leave the Limit search to field set to All Objects, you can select the object type you want to create from a drop-down list. In the Add form, the indicators you selected in the second step of the import process are listed in the Create Relationship section.
Add Comment You can add a comment to one or more extracted indicators. Select the checkbox next to the indicator(s) to update and then click on the Add Info option. Click on the Set Comment tab and enter your comment. Delete Extracted Indicator You can delete one or more extracted indicators. Select the checkbox next to the indicator(s) to delete and then click on the Remove icon. - Click Finish Export.
Troubleshooting
If the CSV fails to parse please review the following points:
- Verify that the file is a CSV.
- Verify that column headers are spelled exactly as they are listed, the parser is case sensitive.
- Verify that all rows have a value for Indicator and Type.
- Verify that all Type and Status values are valid and exist in ThreatQ.
If you have previously hit a failed parse run and believe you have fixed the error but the file will still not parse, logout of TQ, log back in and attempt to parse again.