Managing Integrations
Default ThreatQ Role: Administrative or Maintenance
Custom Role - Action Permissions: Integrations, Orchestration - Edit Orchestration Workflow (required for action type integrations only)
You can add, remove, enable, disable, and configure integrations from the My Integrations page.
Steps may slightly differ depending on the individual integration. Refer to the integration's individual guide for specific details.
Adding Integrations
ThreatQuotient does not issue API keys for third-party vendors. Contact the specific vendor to obtain API keys and other integrated-related credentials.
The steps for upgrading an integration are the same as for adding an integration.
Some custom connectors cannot be installed via the ThreatQ UI. See your connector’s documentation for specific installation steps.
- Log into https://marketplace.threatq.com.
- Locate and download the desired integration file.
- Navigate to your ThreatQ instance.
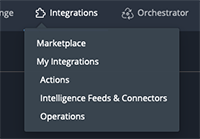
- Click the Integrations option in the main navigation and select My Integrations.
The My Integrations page loads and defaults to the All tab which lists all integrations currently installed on your platform, both enabled and disabled.
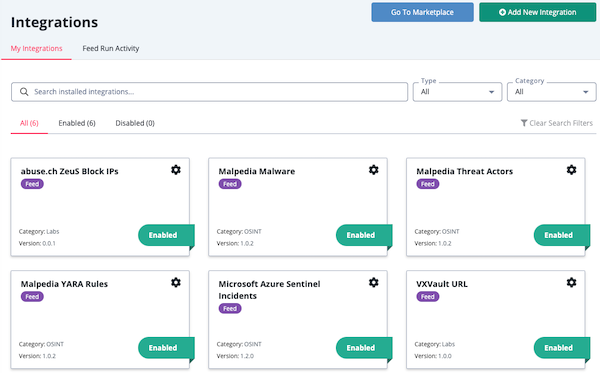
- Click the Add New Integration button.
The Add New Integration dialog box opens with the Add New Integration option selected by default.
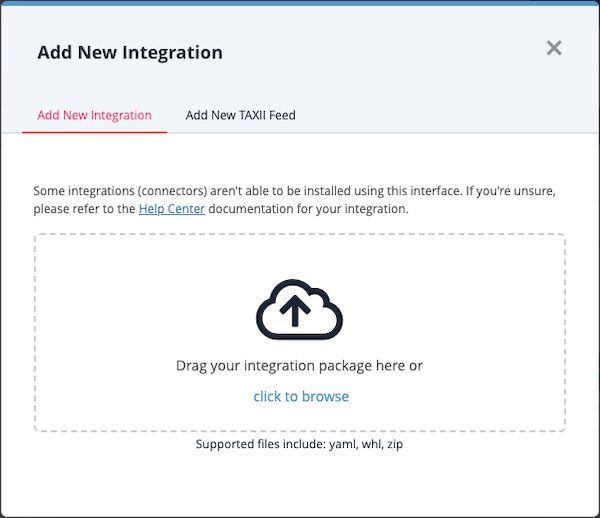
- Upload the integration file using one of the following methods:
- Drag and drop the integration file into the dialog box
- Select the click to browse link to locate the integration file on your local machine
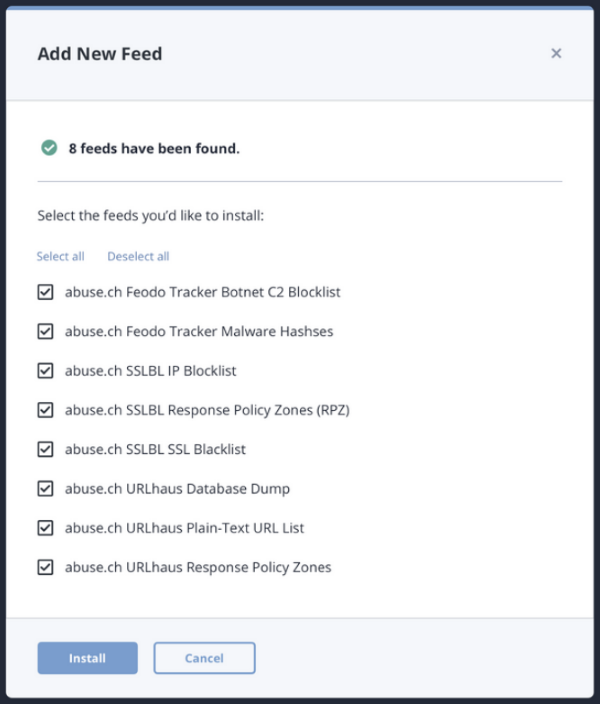
- If the integration file contains multiple feeds, you are prompted to select which feeds to install. Select the feeds to include and click Install.
-
When the install is complete, you must configure and enable the integration before it can be used.
Adding STIX/TAXII Integrations
ThreatQ supports the option to use certificates, opposed to HTTP basic authentication, to authenticate TAXII 2.x feed.
ThreatQuotient does not issue API keys for third-party vendors. Contact the specific vendor to obtain API keys and other integrated-related credentials.
- Click the Integrations option in the main navigation and select My Integrations.

The My Integrations page loads and defaults to the All tab which lists all integrations currently listed on your platform, both enabled and disabled.

- Click the Add New Integration button.
The Add New Integration dialog box opens with the Add New Integration option select by default.

- Click the Add New TAXII Feed option.
The Add TAXII Feed form is displayed.
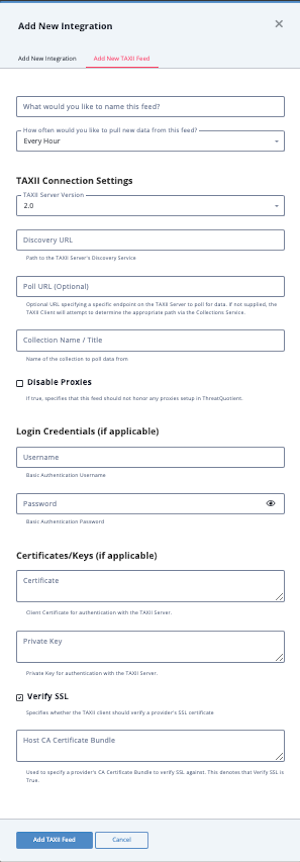
- Complete the following fields:
Field Instructions What would you like to name this feed? Enter the feed name to be displayed throughout ThreatQ. The name must be at least five characters long.
It does not need to match the Collection Name.How often would you like to pull new data from this feed? Choose Every Hour or Every Day. TAXII Connection Settings TAXII Server Version Options include: 1.0, 1.1, 2.0.
This field is required.Discovery URL This is where the TAXII server can be reached.
This field is required.Poll URL An optional URL that specifies a specific endpoint on the TAXII Server to poll for data. Collection Name The name of the collection of data in the feed you will access.
This field is required.Client User Authentication Username If required, enter a username for the feed. Password If required, enter a password. Client TLS/SSL Authentication Client Certificate If required, enter a certificate if required for the feed. Client Key If required, enter a private key if required for the feed. Server Authentication Verify SSL Leave the checkbox checked to require that the TAXII client verify the provider's SSL certificate. Host CA Certificate Bundle The provider's CA Certificate used to verify SSL.
The Host CA Certificate Bundle will not be honored if the Verify SSL option is not selected. - Click Add TAXII Feed.
The TAXII/STIX feed is added to the Integrations page. You must configure and enable the integration before it can be used.
Configuring an Integration
The integration must already be installed in order to access its configuration. See the Adding Integrations topic for more details.
- Click the Integrations option in the main navigation and select My Integrations.

The My Integrations page loads and defaults to the All tab which lists all integrations currently installed on your platform, both enabled and disabled.

- Locate and click the integration to load its details page.
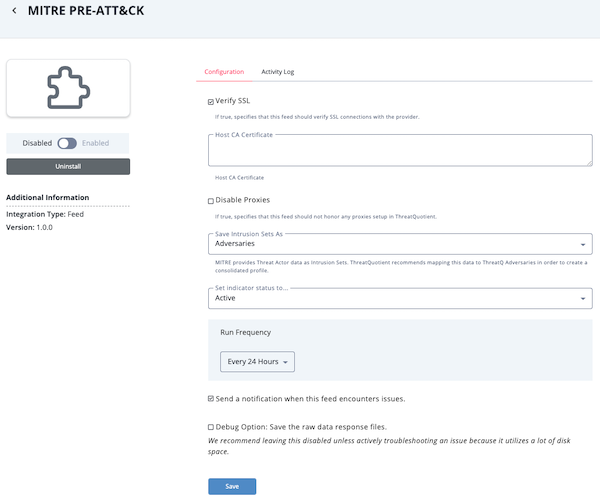
The integration details page displays and lists the following:
- Integration details, such as the author, required ThreatQ version and targeted object types.
- Configuration tab
- Activity Log tab - If the integration is a feed, the Activity Log loads after the initial run.
- Enter the integration’s required configuration parameters:
- Feeds and Connectors - For feeds and some connectors, you can configure feed run frequency and default object status (if the object is an indicator or signature). Refer to the integration's user guide for more details. For instructions on performing a manual feed run - see Performing Manual Runs (feeds).
- Feed Health Notifications - You can also enable feed health notifications for that specific feed. See the Feed Health Notifications for more information.
- Debug Option - The Debug Option checkbox gives you the option to save raw data response files for troubleshooting purposes. Since this option uses a large amount of disk space, it defaults to unchecked. We recommend temporarily enabling the option when you are troubleshooting a feed issue.
- Click Save.
- Click the Enable/Disable toggle switch to enable the integration.
After being enabled, the Feed automatically starts a run.
Feed Health Notifications
Feed Health Notifications allow the ThreatQ application to send you, and other designated users, email and in-app notifications when a feed encounters an issue.
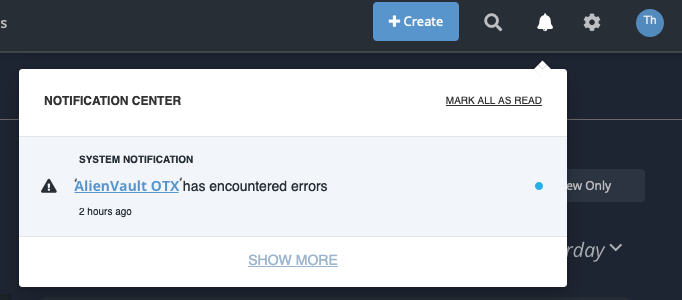
The in-app notifications appear in Notification Center for users with an administrator or maintenance account. These notifications include a link that redirects you to the Activity Log tab on the configuration page for the integration.
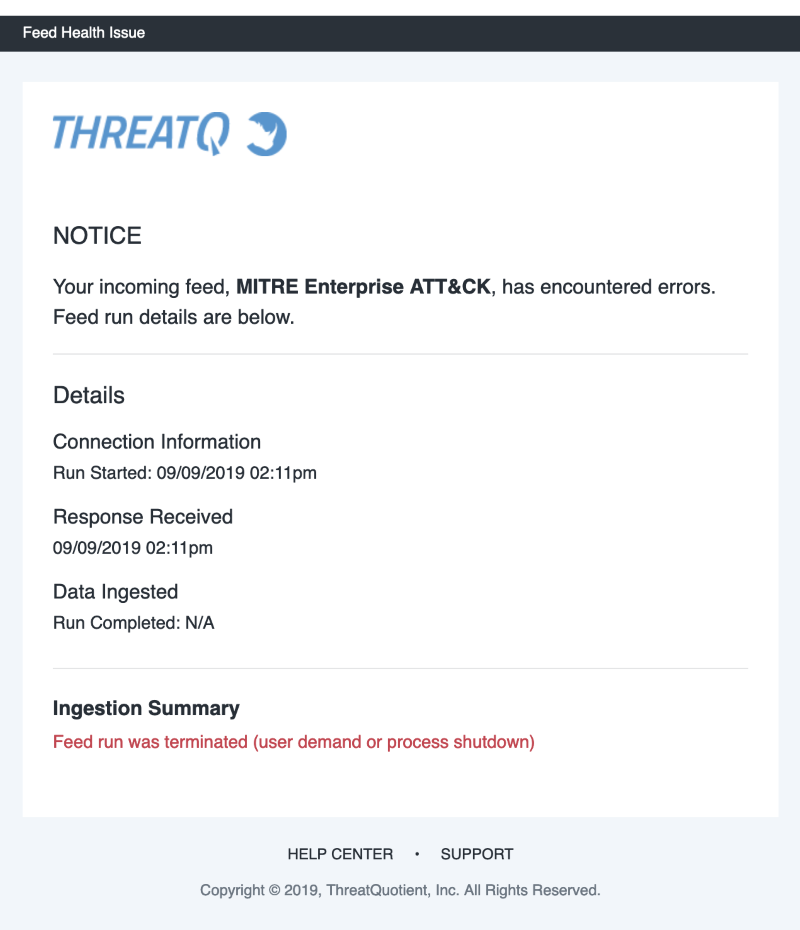
The emails contain useful information such as connection information, data ingested, and an ingestion summary.
See the Notifications topic for more information.
Enabling/Disabling Integrations
You can enable and disable installed integrations for an integration's details page. Disabling an integration allows you to deactivate an integration without completely removing it from your instance.
The integration must already be installed in order to access its configuration. See the Adding Integrations for more details.
- Click the Integrations option in the main navigation and select My Integrations.

The My Integrations page loads and defaults to the All tab which lists all integrations currently installed on your platform, both enabled and disabled.

- Locate and click the integration to load its details page.

The details page displays the integration’s configuration parameters:
- Feeds and Connectors - For feeds and some connectors, you can configure feed run frequency and default object status (if the object is an indicator or signature). Refer to the integration's user guide for more details. For instructions on performing a manual feed run - see Performing Manual Runs (feeds).
- Feed Health Notifications - You can also enable feed health notifications for that specific feed. See the Feed Health Notifications for more information.
- Debug Option - The Debug Option checkbox gives you the option to save raw data response files for troubleshooting purposes. Since this option uses a large amount of disk space, it defaults to unchecked. We recommend temporarily enabling the option when you are troubleshooting a feed issue.
- Click the Enable/Disable toggle switch to either enable or disable the integration.
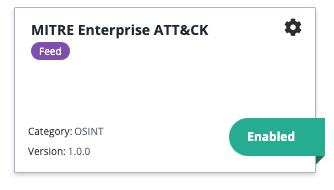
Enabled integrations have a green header and an Enabled banner on the My Integrations page.
Removing an Integration
Removing an integration uninstalls an integration for your instance. All previously ingested data remains in the system. You can also disable an integration to deactivate it without completely removing the integration from your instance.
- Click the Integrations option in the main navigation and select My Integrations.

The My Integrations page loads and defaults to the All tab which lists all integrations currently installed on your platform, both enabled and disabled.

- Locate and click the integration to load its details page.

To locate an integration, you can filter the list by keyword, integration category, and/or status (enabled or disabled).
- Click the Uninstall button located below the Enable/Disable toggle.
The Uninstall dialog box prompts you to confirm the uninstall selection.
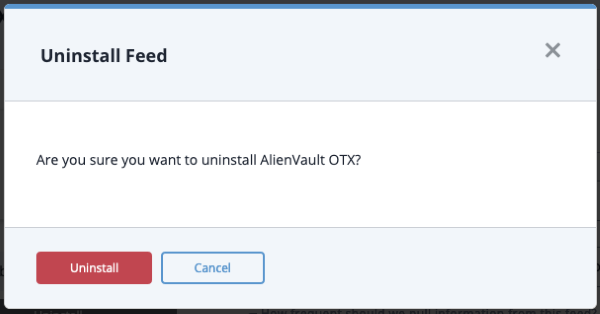
- Click Uninstall to confirm and remove the integration.
Performing Manual Runs (feeds)
Not every feed integration allows users to perform a manual run.
To initiate a manual feed integration run:
- Click the Integrations option in the main navigation and select My Integrations.

The My Integrations page loads and defaults to the All tab which lists all integrations currently installed on your platform, both enabled and disabled.

- Locate and click the integration to load its details page.
To locate an integration, you can filter the list by keyword, integration category, and/or status (enabled or disabled).
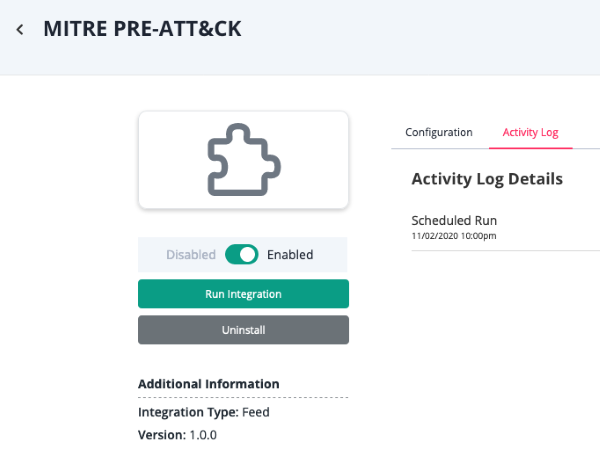
- Confirm that the integration is enabled.
- Click the Run Integration button located beneath Enable/Disable toggle switch.
The Trigger Manual Run window is displayed.If the Run Integration button is not visible, the integration does not support manual runs.
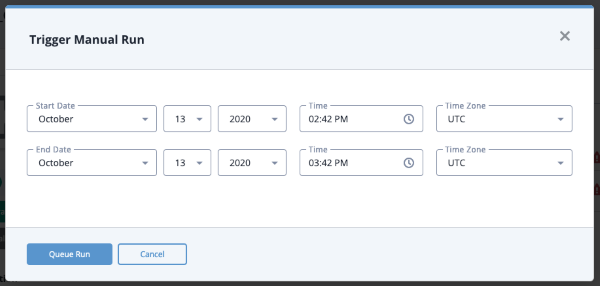
- Populate the following run details:
- Start date, time, and time zone
- End date, time, and time zone
Some feed integrations only support a Start Date.
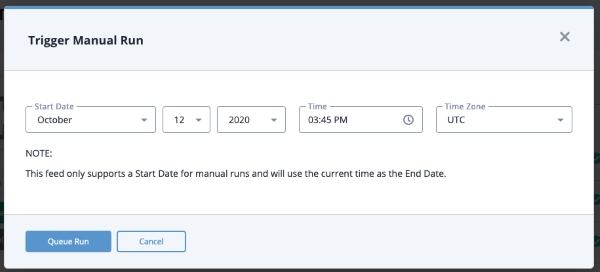
- Click the Queue Run button.
Running an Operation Integration
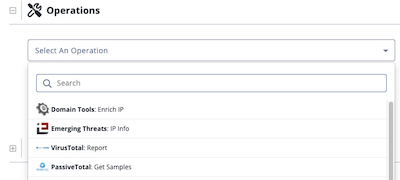
ThreatQ 5x displays each operation's logo in the Select An Operation dropdown list.
Steps may differ based on the individual operation. See the operation’s individual user guide for specific details.
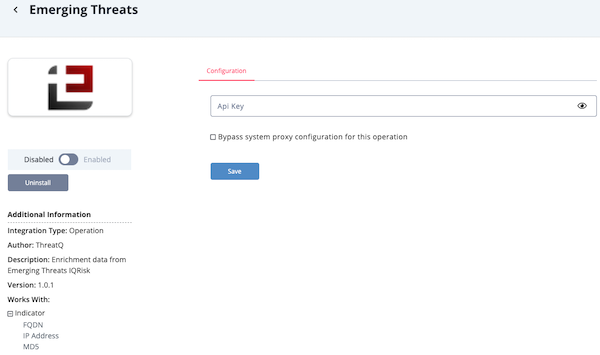
Operations are designed to work with specific object types and sub-types. The operation's details page provides you with a list of object types that work with the operation.
- Navigate to the Threat Library and locate a system object your operation works with.
- Click the object to access its details page.
- Scroll to the Operations pane on the details page.
You can also click the Operations heading located in the left-hand menu to jump to the operations pane. - Expand the Operations pane by clicking the plus sign (+).

- Click the arrow next to the Select An Operation field.
- From this field you can:
- Browse a list of all available operations.
- Type the full or partial operation name in the Search field.
- Click an operation.
Applicable configuration parameters are displayed below the operation name. After you update these fields, click the Run button to run the operation.
If there are no configuration parameters for the operation, the operation runs automatically.
Integration-Related Commands
The following integration-related commands can be found in the About the Command Line Interface (CLI) section: