Fortinet Fortigate Exports
The web format of this guide reflects the most current release. Guides for older iterations are available in PDF format.
Export Details
ThreatQuotient provides the following details for this export:
| Current Guide Version | 1.0.0 |
| Support Tier | ThreatQ Supported |
| FortiOS | >= 6.0 |
Introduction
ThreatQuotient makes it easy for customers to export IOCs to their Fortinet FortiGate Firewall. The implementation is done using the Threat Feed Connectors feature available in FortiOS v6.0 and above. An export with IOCs is first created on ThreatQ and the export URL is installed FortiGate appliance.
This integration only works on FortiOS v6.0 and above.
Prerequisites
Before starting the integration, users are encouraged to familiarize themselves with the following documents:
- Fortinet Fortigate cookbook on blocking malicious domains using threat feeds - https://docs.fortinet.com/document/fortigate/6.0.0/cookbook/85580
- Using Threat Feed Connectors in FortiOS v6.0 and above - https://help.fortinet.com/fos60hlp/60/Content/FortiOS/fortigate-security-profiles/Web_Filter/Overriding%20FortiGuard%20website%20categorization.htm#External
Creating the Export
The export is a dynamic list of IOCs which should be configured on ThreatQ and provided to a FortiGate instance to read from.
See the Managing Exports topic for more details on ThreatQ exports.
- Select the Settings icon > Exports.
The Exports page appears with a table listing all exports in alphabetical order.
- Click Add New Export
The Connection Settings dialog box appears.
- Enter an Export Name.
- Click Next Step.
The Output Format dialog box appears.
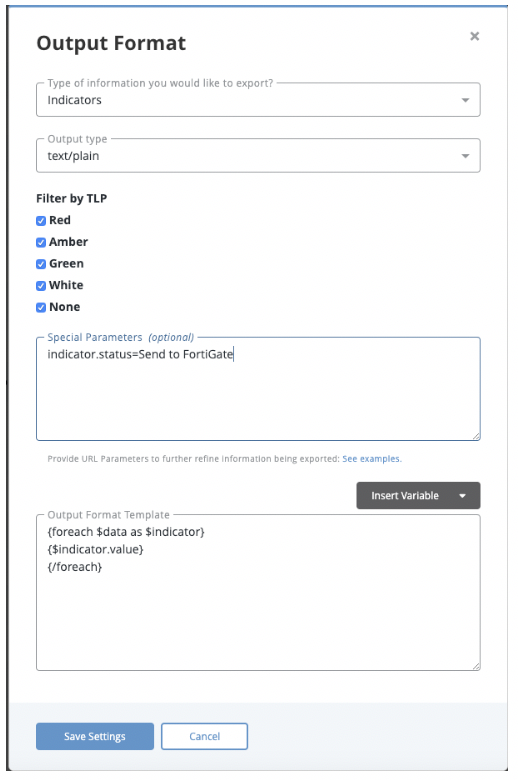
- Provide the following information:
Field Value Type of information you would like to export Indicators Output Type text/plain Special Parameters There are two options for special parameters:
If the security policy of your organization requires that all IP Addresses and FQDNs are sent to FortiGate, use these filters for the special parameters:
indicator.status=Active&indicator.
deleted=N&indicator.type=IP Address& indicator.type=FQDNTo send only the IOCs that have a custom status, e.g. Send to FortiGate, use the special parameters below.
To create the custom status:
- Follow the steps in the Indicator Status topic to create a status called Send to FortiGate.
- Use the following special parameter for your export:
indicator.status=Send to FortiGate
Output Template {foreach $data as $indicator}
{$indicator.value}
{/foreach}Once configured, the export will look similar to the snapshot below.
Configuring FortiGate
The following section will provide you with steps and related resources to configure ForitGate to work with the export.
Configure FortiGate to Download Indicators from ThreatQ
The following detailed steps have been copied from the FortiGate support center and provided here for convenience. The source is https://docs.fortinet.com/document/fortigate/6.0.0/cookbook/85580
Blocking Malicious Domains using Threat Feeds
This example uses a domain name threat feed and FortiGate DNS filtering to block malicious domains. The text file in this example is a list of gambling site domain names.
Threat feeds allow you to dynamically import external block lists in the form of a text file into your FortiGate. These text files, stored on an HTTP server, can contain a list of web addresses or domains. You can use threat feeds to deny access to a source or destination IP address in Web Filter and DNS Filter profiles, SSL inspection exemptions, and as a source/destination in proxy policies. You can use Fabric connectors for FortiGate that do not belong to a Fortinet Security Fabric.
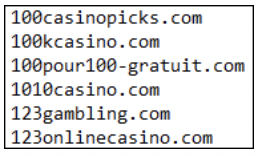
- Create an external block list. The external block list should be a plain text file with one domain name per line. The use of simple wildcards is supported. You can create your own text file or download it from an external service. Upload the text file to the HTTP file server.
- Configure the threat feed:
- In FortiOS, go to Security Fabric -> Fabric Connectors. Click Create New.
- Under Threat Feeds, select Domain Name.
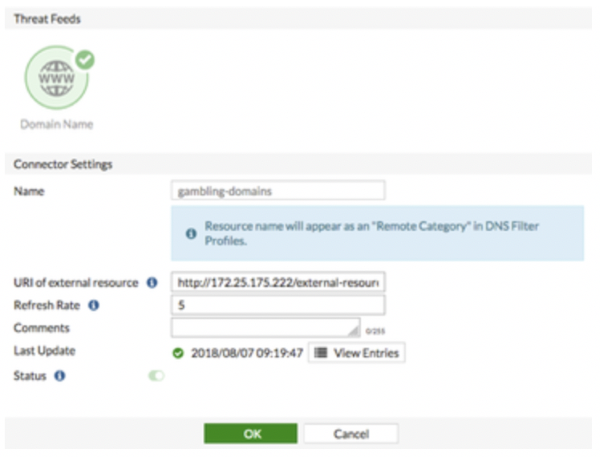
- Configure the Name, URI of external resource, and Refresh Rate fields. In the URI of external resource field, enter the location of the text file on the HTTP file server. By default, the FortiGate rereads the file and uploads any changes every five minutes.
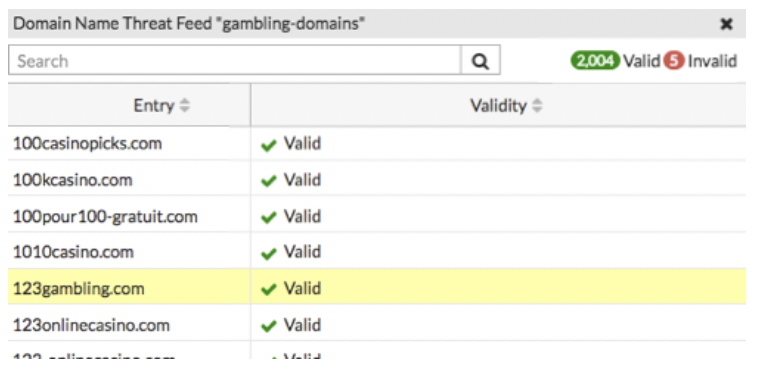
- Click View Entries to see the text file's domain list.
- Click OK.
- Add the threat feed to the DNS filter:
- Go to Security Profiles -> DNS Filter.
- Scroll to the list of preconfigured FortiGuard filters.
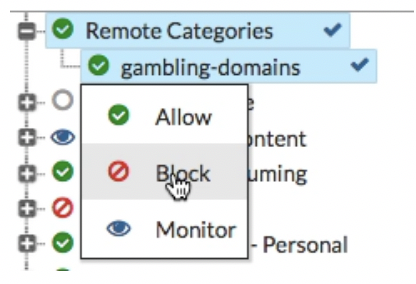
- The resource file uploaded earlier is listed under Remote Categories. Set the action for this category to Block.
- Configure the outgoing Internet policy:
- Go to Policy & Objects -> IPv4 Policy.
- Enable the DNS Filter under the Security Profiles.
- From the SSL Inspection dropdown list, select an SSL inspection profile.
- View the results:
- Visit a domain on the external resource file. This example visits 123gambling.com. A Web Page Blocked! message appears.

- In FortiOS, go to Log & Report -> DNS Query. The logs show that the 123gambling.com domain belongs to a blocked category.

- Visit a domain on the external resource file. This example visits 123gambling.com. A Web Page Blocked! message appears.
Change Log
- Version 1.0.0
- Initial release
PDF Guides
| Document | ThreatQ Version |
|---|---|
| Fortinet Fortigate Exports Guide v1.0.0 | N/A |