Fortinet FortiSIEM IOC Exports
The web format of this guide reflects the most current release. Guides for older iterations are available in PDF format.
Export Details
ThreatQuotient provides the following details for this export:
| Current Guide Version | 1.0.0 |
| Compatible with Fortinet version | 7.x |
| Support Tier | ThreatQ Supported |
Introduction
This guides describes the steps required to export IoCs from ThreatQ and import them into Fortinet ForiSIEM.
Prerequisites
The following is required to perform the steps outline in this guide:
- ThreatQ Account with an Administrator role in order to create the export.
- Fortinet Account with an Administrator role to create the import.
Creating the Export
The following section will detail how to create the exports in ThreatQ.
See the Managing Exports topic for more details on ThreatQ exports.
- Select the Settings icon > Exports.
The Exports page appears with a table listing all exports in alphabetical order.
- Click Add New Export
The Connection Settings dialog box appears.
- Enter the following in Export Name field:
FortiSIEM Malware Domains. - Click Next Step.
The Output Format dialog box appears.
- Provide the following information:
Field Value Type of information you would like to export? Indicators Output type text/plain Special Parameters Enter your special parameters to filter the objects. Example:
indicator.deleted=N&indicator.type=FQDN&indicator.score=>=4See the Output Format Options and Filtering Special Parameters topic for further details on special parameters.
Output Template {foreach $data as $indicator}
{$indicator.value}
{/foreach} - Click on Save Settings and enable the export via the On/Off toggle switch.
Creating the Import in FortiSIEM
- Log into FortiSIEM.
- Click on the Resources heading in the navigation bar.

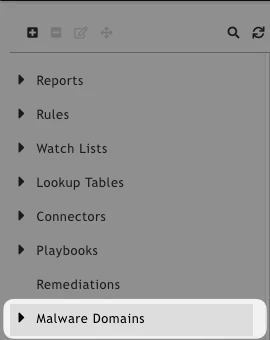
- Click on the Malware Domains section located on the sidebar.

- Click on the + button at the top of the sidebar.

- Enter a Group Name and an optional Description.
- Save the group.
- Expand the Malware Domains group and select your new group.

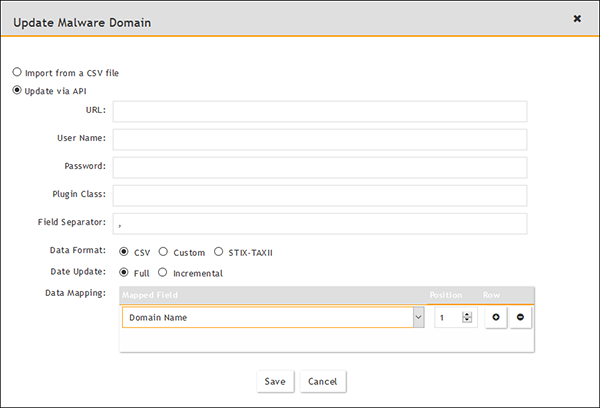
- Click on the More dropdown, located at the top of the page’s table, and select Update.

- Select the Update via API radio button.
- Click on the Edit button to expand the dialog box.
- Complete the following fields:
Anything not specified below can be left at the default.
Field Description URL Paste your ThreatQ export url into the field. Make sure to remove the limit parameter when you have finished testing.
Data Format CSV Data Update Full Data Mapping Select Domain Name from the dropdown and set the Position to 1.

- Click Save.
- Click on the + icon next the Schedule text, to open the new schedule form.
- Create your new recurring or one-time schedule. It should look similar to the following example:

- Click Save and then close the dialog box.
- The ThreatQ export will now be pulled into FortiSIEM on the specified schedule.
Change Log
- Version 1.0.0
- Initial release
PDF Guides
| Document | ThreatQ Version |
|---|---|
| Fortinet FortiSIEM IOC Export Guide v1.0.0 | N/A |