Use Case - ThreatQ Investigations
ThreatQ Investigations (TQI) is your go-to tool for threat hunting, incident response, alert triage, and vulnerability management because it allows you to visualize a network of threats and vulnerabilities as well as track your efforts to manage and address both. This use case focuses on TQI as a threat hunting tool and center of operations as we leverage a CrowdStrike Intelligence report as the starting point for a search for abnormal activity and signs of compromise.
Navigation Tips
As you add data to the TQI Evidence board, you will notice that the icons on the board reflect the data added.
 Report Report |
 Adversary Adversary |
 IP Address IP Address |
 Attack Pattern Attack Pattern |
 Malware Malware |
|
 Event Event |
 Course-of-Action/Mitigation Course-of-Action/Mitigation |
 Task Task |
In keeping with this, each section of the use case lists the icons for the data added.
CrowdStrike Intelligence Report
The cornerstone of this investigation is a CrowdStrike Intelligence Report that references an IP address we want to examine more closely. To this end, let’s add the CrowdStrike Intelligence Report and suspicious IP address to the Evidence Board to begin our investigation.
 Add a CrowdStrike Intelligence Report
- From the Investigations page, type the report ID in the search field.
- Click the report ID to add the report to the Evidence board.
- Enter the IP address of interest in the search field.
- Click the IP address to add it to the Evidence board.
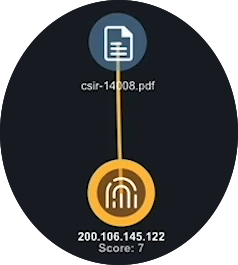
- From the Evidence board, select both the report ID and the IP address.
Pro Tip
To select multiple items on the Evidence board, press and hold the Cmd/Ctrl button and click each item. - Right-click and select the Link option.
Now, the Evidence board displays a link linking the report and the IP. No matter where you move these items on the board, the link serves as a visual reminder of their connection.


 Research a Suspicious IP Address
In this stage of the investigation, we run operations on a suspicious IP address as well as adding attributes, events, and indicators associated with the IP.
- From the Evidence board, click the IP address.
- From the Action panel, click the Run Operation button.
Running operations gives us more information on the IP address. The Operations window lists all the operations applied to the IP.
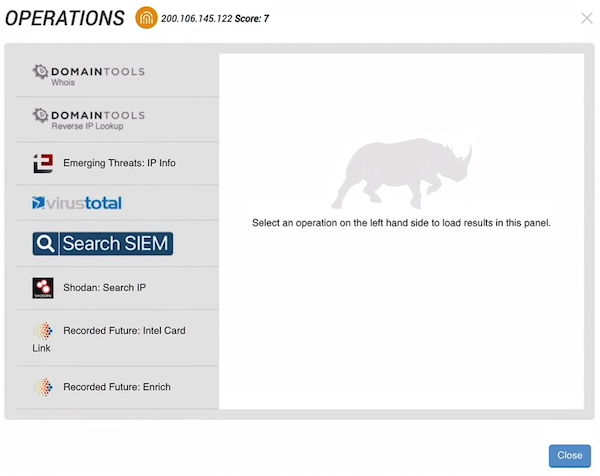
- Click the operation names to view the information returned by each.
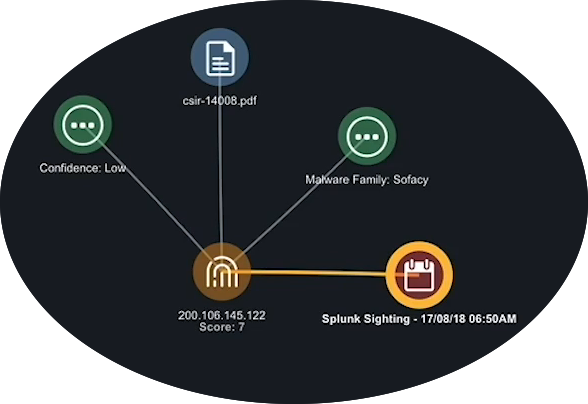
- From the Relationships section on the Action panel, click the arrow next to Attributes to view a list of the IP’s attributes.
- Click the plus (+) next to an attribute to add it to the evidence board.
Pro Tip
When you add an item to the Evidence board, the system automatically adds lines linking the item to any associated items on the board. - Next, click the arrow next to the Events section.
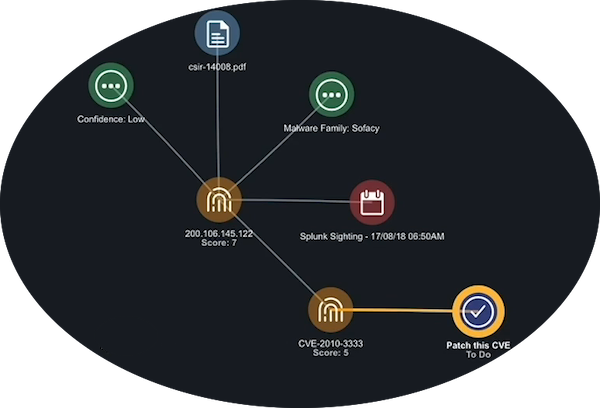
- Click the plus (+) next to an event to add it to the evidence board. In this example, let’s add a Splunk Sighting to the board.
- From the Evidence board, click the Splunk Sighting to view more details in the Action panel.
- From the Relationships section on the Action panel, click the arrow next to Indicators to view a list of indicators associated with the IP.
- Click the plus (+) next to an indicator to add it to the evidence board. In this case, let’s add a CVE indicator to the board.
- To run an operation on the CVE indicator, click the Indicator on the board and then click the Run Operations button in the Action panel.
The Operations window lists all the operations applied to the CVE indicator.
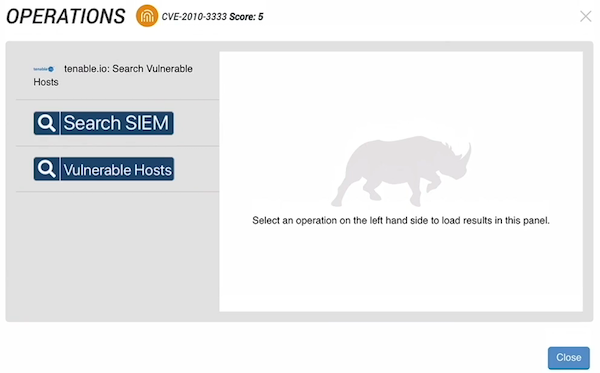
- Click the operation names to view the information returned by each. The Vulnerable Hosts operation indicates we are vulnerable to the CVE.
- Click the Close button to close the Operations window.
 Create a Task to Patch the CVE
- From the Evidence board, right click the CVE indicator and select the New Task option.
- Populate the Add Task window.
- Click the Save button to add the new task to the Evidence board. It will also appear in the queue of the team to which you assigned it.


 Add Adversary Associations
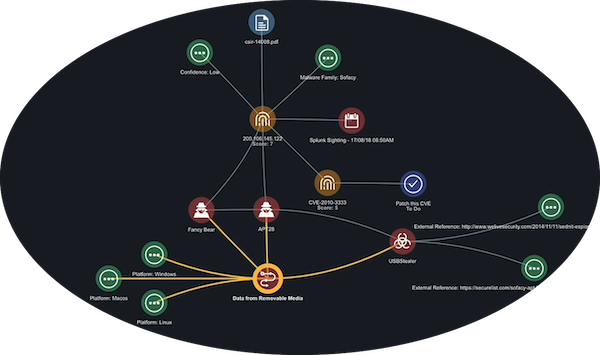
Once you identify the primary adversary behind an attack, you can dig into their methods by pulling their known attack patterns and malware into your investigation. At this stage you also take the first step toward addressing the attack by researching external references that describe previously applied malware mitigation strategies.
- From the Evidence board, click the IP.
- From the Action panel, move to the Relationships section and click the arrow next Adversaries.
- Click the plus (+) next to each adversary you want to add to the board.
Pro Tip
If you want to add all the adversaries associated with the IP. You can right click the IP on the board and select the Expand option. Then, click the Adversaries option to add all of the adversaries associated with the IP to the board. - When you click an adversary icon on the Evidence board, the Action panel displays more information on that adversary including techniques.
- To add an adversary technique to the board, move to the Relationships section and click the arrow next to Attack_Pattern.
Pro Tip
Attack patterns are derived from MITRE ATT&CK data and help you understand an adversary’s methods so you can build better mitigation strategies. - Click the plus sign next to an attack pattern to add it to the board.
- From the Evidence board, click the attack pattern icon to review the description as well as other attributes.
- To add an attack pattern attribute to the board, move to the Relationships section and click the arrow next to Attributes to view the list.
- Click the plus (+) next to an attack pattern to add it to the board.
- To add the malware associated with an adversary to the board, move to the Relationships section and click the arrow next to Malware to view the list.
- Click the plus (+) next to a malware name to add it to the board.
Pro Tip
When you add malware to the Evidence board, it is linked to the associated adversary and technique. - From the Evidence board, click the malware icon to review the description as well as other attributes. The External Reference fields in the Attributes section provide links to websites with more information including mitigation strategies for the malware.
- To add an external reference to the board, move to the Relationships section and click the arrow next to Attributes to view the list.
- Click the plus (+) next to an external reference to add it to the board.

 Find Mitigation Strategies
In this stage, we are going to explore previously applied mitigation strategies for the adversary’s known attack patterns and use this information to develop our own response.
- From the Evidence board, click an attack pattern.
- To add a mitigation to the board, move to the Relationships section and click the arrow next to Course_Of_Action to view the list.
- Click the plus (+) next to a mitigation to add it to the board.
- From the Evidence board, click a mitigation. The External Reference fields in the Attributes section provide links to websites with more information on how to deploy or develop the mitigation.
- To add an external reference to the board, move to the Relationships section and click the arrow next to Attributes to view the list.
- Click the plus (+) next to an external reference to add it to the board.
 Create a Mitigation Task
Armed with all the information from the Evidence board, we are now ready to outline the steps to be taken and assign these tasks to employees in our organization.
- From the Evidence board, right-click the mitigation
- Select the New task option.
The Add Task window is displayed. - Populate the task details. This allows you to specify the mitigation steps to be taken and who is responsible for completing these actions.
- Click the Save button.
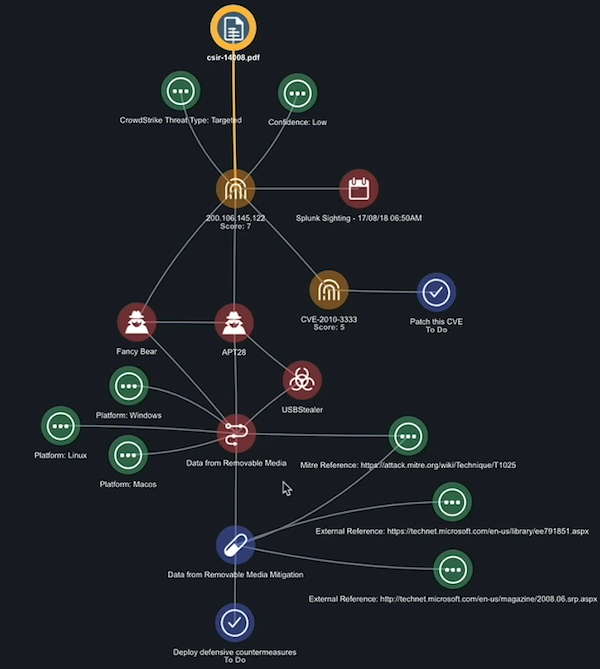
The new mitigation task is now displayed on your Evidence board.
Continuing the Hunt
You now have a well-developed Investigation Board for your threat hunt.
However, the hunt is not over. You can continue to add to the information around the threat as well as add more proactive and reactive tasks to address it. In addition, when another threat arises you can return to this board to refresh your memory or coach your team on meeting the next challenge.