Data Collections
Default ThreatQ Role: Administrative, Maintenance, or Primary Contributor
Custom Role - Action Permissions: Artifact Management - Data Collections - Create. Edit Delete OR View Only
Once saved, a Data Collection can be used by dashboard widgets, integrations, TQO actions, TAXII collections, and other workflows.
Use caution when deleting a data collection as it could be associated with integrations, custom dashboards, TAXII collections, and other workflows in use with your organization.
Saving Searches as Data Collections
- Perform a search on the Threat Library.
- Click the Save As link.
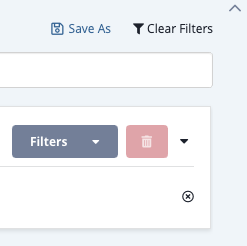
The Save Data Collection dialog box opens.
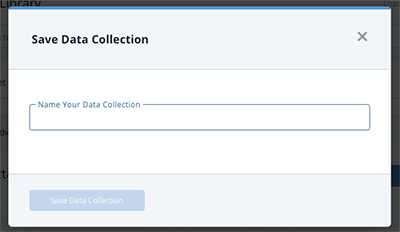
- Enter a name for the search in the Data Collection dialog box.
- Click the Save Data Collection button.
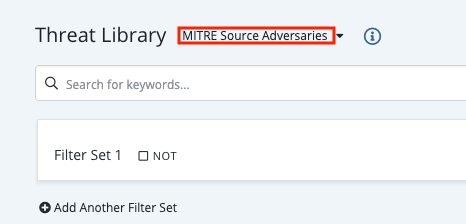
The name of the data collection is displayed at the top of the page. As the data collection creator, you have owner-level permissions and are the only user who can view or edit the data collection. See the Sharing Data Collections section for information on allowing other users to access your data collection.
Loading Data Collections
- Navigate to the Threat Library page.
- Click the Load Data Collection Search option. The data collection window defaults to the All tab that lists all the data collections you own or to which you have view or edit access. The Owned By Me tab lists the data collections for which you are the owner. You can also locate a data collection by using the search field.
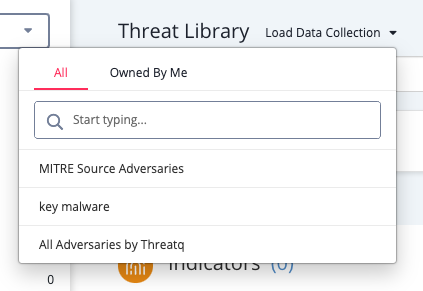
- Select the data collection.
The data collection is displayed in the Threat Library page. The name of the data collection is listed at the top of the page.If the data collection name is longer than forty characters, it is truncated with ellipses

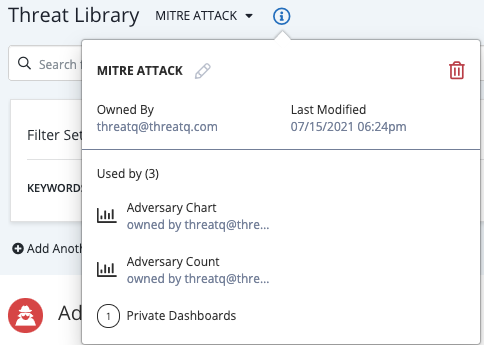
- Click the
 icon to view:
- Data collection name and owner
- Date of the last change to the data collection
- Dashboards, data feeds, TAXII collections, and workflows that use the data collection. You can click these items to access the corresponding dashboard or data feed.
- The number of private dashboards that use the data collection
Modifying a Data Collection
Users with owner or editor permissions for a data collection can make changes to it.
- Navigate to the Threat Library.
- Load the data collection you want to change.
- Enter your changes to the data collection.
- Click the Save link.
Copying a Data Collection
When an owner or editor makes changes to a data collection, the Save As link allows the creation of a new data collection that reflects these changes and leaves the original data collection unchanged. For example, you can add a filter to an existing Adversaries data collection to include only MITRE Enterprise ATT&CK sources, then save the new data collection as Adversaries - MITRE Enterprise.
- Navigate to the Threat Library.
- Load the data collection you want to copy.
- Enter your changes to the data collection.
- Click the Save As link.
The Save Data Collection window is displayed.
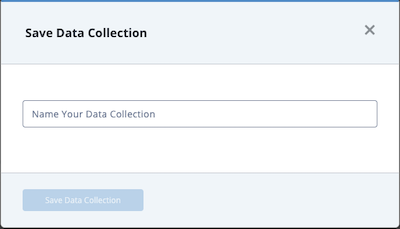
- Enter the name of the new data collection.
- Click the Save Data Collection button.
ThreatQ creates your new data collection and displays it in the Threat Library page.
Renaming a Data Collection
Only the owner of a data collection can change its name.
- Navigate to the Threat Library.
- Load the data collection whose name you want to change.
- Click the
 icon.
icon. - Click the
 icon next to the data collection's name.
 - Enter the new name.
- Click the
 to save your change.
Sharing Data Collections
Owners and editors have the option to share a data collection with other users. However, only the data collection owner can remove a user's permissions. In addition, the Share(d) button displayed depends on your permission level and the sharing status of the data collection.
| Permission Level | Shared with Others? | Share(d) Button |
|---|---|---|
| Owner | No |  |
| Owner, Editor | Yes |  |
| Viewer | Yes |  |
See the Sharing topic for more information on the permissions you can assign to each data collection.
- Navigate to the Threat Library.
- Load the data collection you want to share.
- Click the Share button.
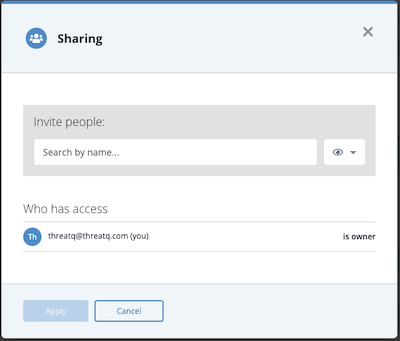
The Sharing window allows you to select the user to which you want to grant access.
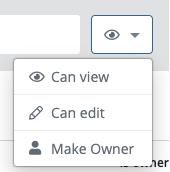
- Click the arrow next to the
 icon to select the user's permission level.
If you are granting access to all users, you must select the Can View option. You can only assign editing permission to individual users not to all users.
If you assign owner permissions to another user, your permissions automatically change to editor-level.
- Use the search field to locate and select the user name or the Everybody (Public) option. This option grants view-only access to all users.
The user is now listed in the Who has access list. From this listing, you can change or delete the user's permissions.
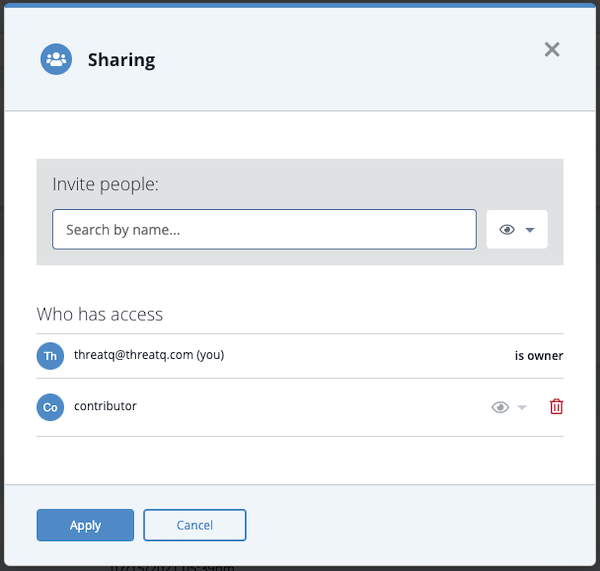
- Click the Apply button to save the user's permission level.
Removing a User's Access to a Data Collection
Only the data collection owner can remove a user's permissions.
- Navigate to the Threat Library.
- Load the data collection to which you want to remove a user's access.
- Click the Share button.
- Click the
 icon next to the user's name.
Deleting a Data Collection
To delete a data collection, you must have owner-level permissions for the data collection.
Deletion of a data collection cannot be undone. Exercise caution before deleting a data collection as it could be associated with integrations, custom dashboards, TAXII collections, and other workflows in use with your organization.
Method 1:
- Navigate to the Threat Library.
- Click the Load Data Collection Search option.
- Click the Owned By Me tab.
- Check the box next to the data collection you want to delete.
- Click the
 icon.
icon.
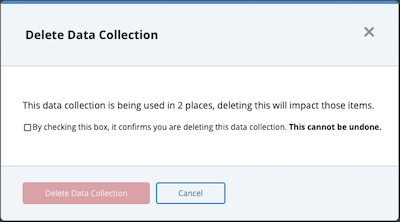
The Delete Data Collection window prompts you to confirm your deletion - Check the warning checkbox and click the Delete Data Collection button to confirm.
Method 2:
- Navigate to the Threat Library.
- Load the data collection you want to delete.
- Click the
 icon next to the data collection name.
 - Click the
 icon.
icon.
The Delete Data Collection window prompts you to confirm your deletion - Check the warning checkbox and click the Delete Data Collection button to confirm.