Signatures
Default ThreatQ Role: Administrative, Maintenance, or Primary Contributor
Custom Role - Action Permissions: Objects & Context - Perform Bulk Manual Import, Create, Edit, Delete Objects, Create, Edit, Delete Attributes,Create, Edit, Delete Relationships. See the Interdependent Permissions topic.
Note: If a user has View Only permission for Sources, system object parsers default to the user’s login as the object source.
Signatures contain the blueprints or patterns associated with a malicious attack on a network or system.
ThreatQ provides you with the ability to ingest and manage Signatures, such as Snort, YARA, and OpenIOC. While importing, ThreatQ parses the signature file for Indicators to add. Once signatures are included in your deployment, you can add contextual information and correlate them with Indicators, Events, Adversaries, and Files.
Transcript: TEXT
Footage from ThreatQ Version 4.55.0
Adding a Signature
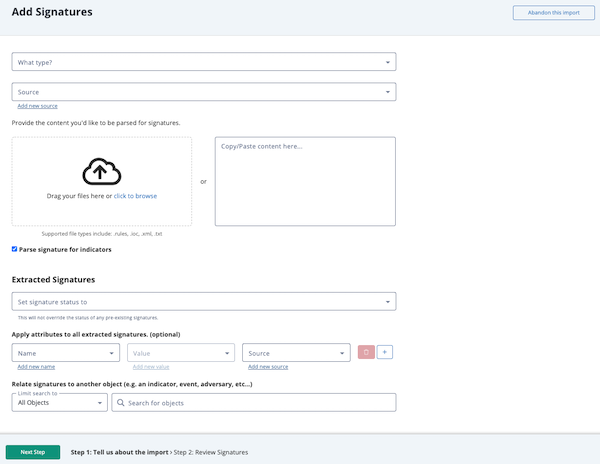
- From the main menu, choose Create > Signature.
The Add Signatures dialog box opens.

- Choose the type of signature from the dropdown .
- Select a Source from the dropdown provided.
You can also click the Add a New Source option if the desired source is not listed in the dropdown list . If administrators have enabled TLP view settings, you can select a TLP label for the new source in the dropdown list provided. See the Traffic Light Protocol (TLP) topic for more information on TLP schema. - Do one of the following:
- Drag your file(s) into the left pane.
- Click click to browse, and locate the file you wish to upload.
- Copy/paste content into the right pane.
- Optionally, select to parse the signature for indicators.
-
Choose a Signature Status from the drop-down menu.
-
Optionally, Apply attributes to all extracted signatures:
- Select an Attribute Type.
- Enter an Attribute Value.
- Enter an Attribute Source.
You can click on the Add icon for additional attributes.
- Optionally, relate the signature to another object by entering the object in the Relate signatures to another object field.
If you enter an object name that is not found, you can click the Create link to add the new object. If you limit your search to a specific object type, you are linked to the corresponding form. For example, if you limit your search to Adversaries, the Create link opens the Add An Adversary form. If you leave the Limit search to field set to All Objects, you can select the object type you want to create from a drop-down list.
- Click Next Step.
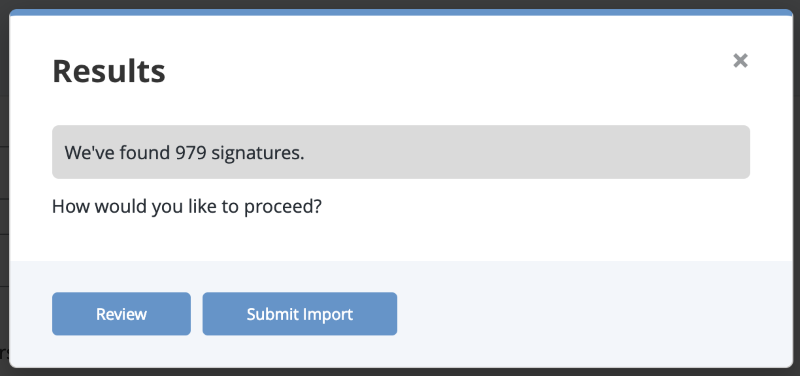
If signatures are discovered, the Results dialog box appears.

- You can either select Submit Import to finish adding the signatures or Review to customize what data is imported.
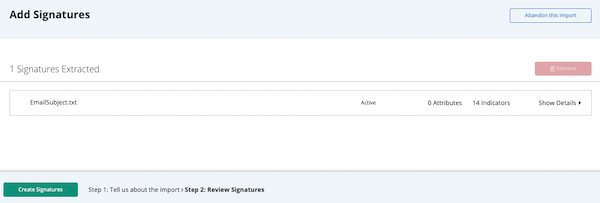
If you selected to review signatures, the Add Signatures Step 2: Review page loads.

- Select one or more signatures and click Delete.
- Click on Show Details for a signature to review individual items in a signature. Use the checkboxes to select unwanted signature items and click Delete.
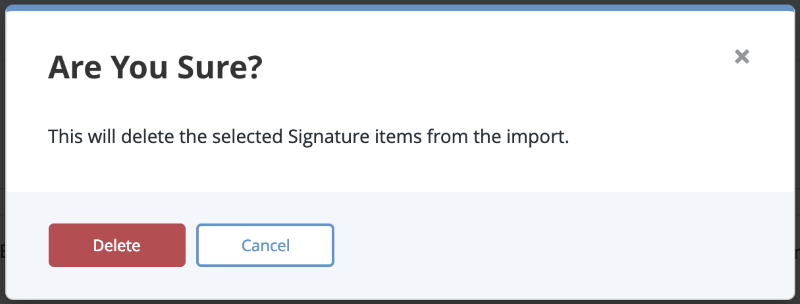
A warning dialog box appears.

- Click Delete to remove the unwanted items.
- Click Create Signatures when finished.