Managing Custom Login Banners
Default ThreatQ Role: Administrative or Maintenance
Custom Role - Action Permissions: Administrative Functions - Edit System Configurations
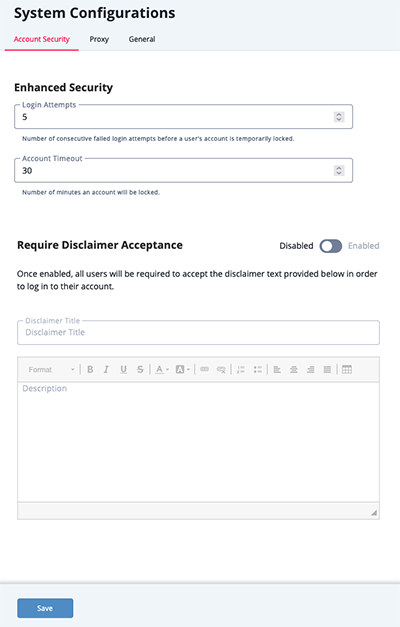
The Require Disclaimer Acceptance section of the Account Security tab allows system administrators to enable a custom message displayed to all users when logging into the ThreatQ Platform. When enabled, ThreatQ users are required to review and accept the message.
In order to comply with government regulations, a customer could configure a custom banner to display a message during login requiring users to accept additional privacy and security terms.
Banner Behavior
The Require Disclaimer Acceptance toggle allows you to enable/disable the display of the custom banner.

When the toggle is disabled:
- The banner title and body are visible to administrators in the Account Security tab, but the banner is not displayed to users upon log in.
- Users can access to the platform using only their credentials
When the toggle is enabled:
- After a user enters their login and password, the custom banner displays. Users must click the Accept and Continue button to access the platform.
- If a user closes the banner without clicking the Accept and Continue button, he is returned to the login screen and cannot access the platform until he clicks the Accept and Continue button.
Users are required to click the Accept and Continue button each time they log into platform.
- If a user is logged out and enters a URL for a specific page in the platform, the custom banner is displayed and he must click the Accept and Continue button to access the specified page.
Enabling a Custom Banner
Only administrators have access to enable the custom banner configuration fields in the Account Security tab on the System Configuration page.
- Navigate to Settings
 > System Configurations.
The System Configuration page loads with the Account Security tab selected by default.

- Click the toggle switch in the Require Disclaimer Acceptance section to enable the display of the custom banner.
- Enter the banner title to be displayed at the top of the banner in the Disclaimer Title field.
- Enter the body of the message in the Description field.
The Description field supports standard text formatting as well as the use of links and tables.
- Click the Save button.
The next time a user logs in, he is prompted to review and accept the custom banner before proceeding to the platform.