Configuring Time and Date Settings
Default ThreatQ Role: Administrative or Maintenance
Custom Role - Action Permissions: Administrative Functions - Edit System Configurations
If you make changes to the date and time format while another user is working in the same ThreatQ installation, that user must refresh his browser for the changes to take effect.
Tips and Tricks
- The Suggested option in the Timezone Display field is based on your browser timezone.
- The Timezone Display field allows you to scroll through a list of timezones in alphabetical order by continent/region and city or search for a timezone by city, region or timezone abbreviation or name.
- After you select a timezone, the Reset option allows you to reset your timezone display to Greenwich Mean Time (GMT).
- Click the Settings icon
 and select the System Configurations option.
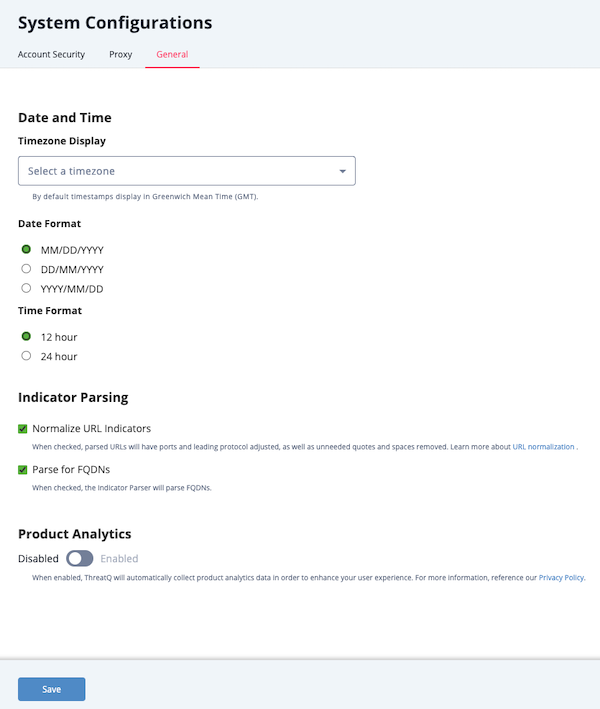
 - Click the General tab.

- Click the Timezone display field to select the default timezone used to display times in ThreatQ. Users can select a different timezone to display in their ThreatQ sessions. See the Managing User Accounts section for more details.
The system timezone setting only affects the display of timestamps in the user interface and PDFs. ThreatQ continues to store timestamps in UTC and share UTC timestamps with resources such as ThreatQ Data Exchange (TQX), ThreatQ TDR Orchestrator (TQO), exports, and TAXII.
- Select the desired Date Format. Options include: MM/DD/YYYY, DD/MM/YYYY, YYYY/MM/DD
- Select the desired Time Format. Options include: 12 hour, 24 hours.
- Click the Save button.
If you make changes to the date and time format while another user is working in the same ThreatQ installation, that user must refresh his browser for the changes to take effect.
- Navigate to Settings
 > System Configurations.
 - Click the General tab.
- Select the desired Date Format. Options include: MM/DD/YYYY, DD/MM/YYYY, YYYY/MM/DD
- Select the desired Time Format. Options include: 12 hour, 24 hours.
- Click the Save button.