Getting Started with Investigations
Managing investigations begins with the Investigations page. You can create one or more investigations and this page serves as your access point. On the Investigations page, you can:
- View all the investigations you created or investigations another user shared with you.
- Create and delete investigations.
- View a date and time stamp for the last person who updated an investigation.
- Manage current investigations.
As you create or enter an investigation, the system navigates you to the investigations workbench, which is comprised of the evidence board, action panel, and timeline. You will learn how to interact with these components later in this user guide.
Starting an Investigation
- Select one of the following options:
Path Use When... Investigations menu > Start your first investigation button This is your first investigation Threat Library Actions menu > Start Investigation You want to add the current object to a new investigation Investigations page > Create Investigation button General use. Top Navigation bar > Create button General use.
The Create Investigation window is displayed.

- Populate the Create Investigation window as follows:
- Type a Name for the investigation.
- Select a Status:
- Open - Open investigations appear as normal on the Investigations page.
- Closed - Closed investigations appear greyed out on the Investigations page.
- Select a Priority:
What is normal or escalated depends upon your organization.
- Normal
- Escalated
- Optionally, type a Description for the investigation.
- Click Create.
The investigation workbench appears.If you created this investigation via the Threat Library Actions menu, the associated object is automatically added to the investigation and displayed on the evidence board.

Transcript: TEXTFootage from ThreatQ Version 4.57.0
Managing Investigations
After an investigation is created, you can manage it on the Investigations page.
-
From the Investigations menu, click the Browse All button.

-
The following table describes the actions you can take to manage your investigations on the Investigations page.
To You can Create a new investigation See Starting an Investigation. Filter the investigations displayed See Filtering Investigations. Continue an investigation Select the investigation title; see Continuing an Investigation. Share an investigation See Sharing an Investigation. Pin an investigation See Pinning an Investigation. Delete an investigation Click the vertical ellipsis menu and select Delete; see Deleting an Investigation. Edit an investigation See Editing an Investigation.
Investigation Shortcuts
The following keyboard and mouse shortcuts allow you to quickly view and navigate investigations:
| Task | Shortcut |
|---|---|
| Select a node | Click the node. |
| Add a node to a selection |
|
| Select multiple nodes | Shift + Click and drag to draw a box around the nodes you want to select |
| Pan the evidence board | Click and hold a position on the evidence board (not a node) + Move your mouse in the desired direction |
| Zoom In/Zoom Out |
|
| Access the context menu | Right-click |
| Arrange nodes |
|
Filtering Investigations
To manage the investigations displayed on the Investigations page, you can apply filters.
- Click the Investigations menu and select one of the following options:
-
Click a pinned investigation to access it directly.
-
Click the Browse All button to access the Investigations page.
If you have not pinned any investigations, clicking the Investigations menu takes you directly to the Investigations page.
-
- Use the following filters to customized your view of the Investigations page:
Filter Options Visibility - All
- Private
- Shared
Status - All
- Open
- Closed
Priority - All
- Normal
- Escalated
Continuing an Investigation
To return to an investigation after working in another area of ThreatQ, complete the following steps:
- Click the Investigations menu and select one of the following options:
-
Click a pinned investigation to access it directly.
-
Click the Browse All button to access the Investigations page.
If you have not pinned any investigations, clicking the Investigations menu takes you directly to the Investigations page.
-
- From, the Investigations page, click the name of the investigation you want to continue.
The investigation workbench is displayed.
Sharing an Investigation
Owners and editors have the option to share an investigation with other users as well as update or remove their sharing permissions. In addition, the Share(d) button displayed depends on your permission level and the sharing status of the data collection.
| Permission Level | Shared with Others? | Share(d) Button |
|---|---|---|
| Owner | No |  |
| Owner, Editor | Yes |  |
| Viewer | Yes |  |
You can share an investigation from the Investigations page or the evidence board of the investigation. See the Sharing topic for more information on the permissions you can assign to each investigation.
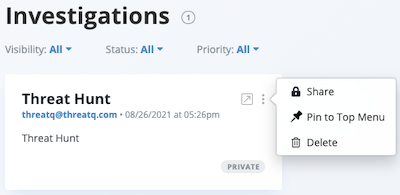
- From the Investigations page, locate the investigation you want to share.
- Click the vertical ellipsis menu and select the Share option.
The Sharing window allows you to select the user to which you want to grant access.
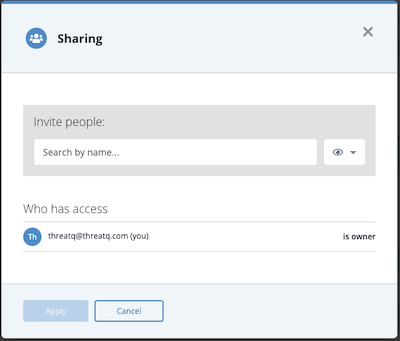
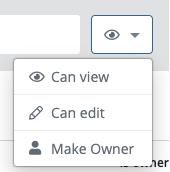
- Click the arrow next to the
 icon to select the user's permission level.
If you are granting access to all users, you must select the Can View option. You can only assign editing permission to individual users, not to all users.
If you assign owner permissions to another user, your permissions automatically change to editor-level.
- Use the search field to locate and select the user name or the Everybody (Public) option. This option grants view-only access to all users.
The user is now listed in the Who has access list. From this listing, you can change or delete the user's permissions.
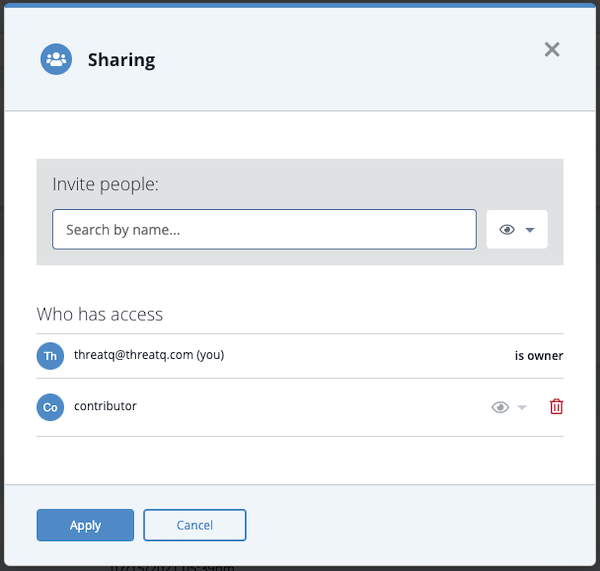
- Click the Apply button to save the user's permission level.
Pinning an Investigation
You can create a Favorites list of frequently accessed investigations by pinning them to the Investigations menu. These shortcuts allow you to bypass the Investigations page and go directly to the investigation's evidence board.
Method 1 - Investigations Page
- From the Investigations page, locate the investigation you want to pin to the Investigations menu.
- Click the vertical ellipsis menu and select the Pin to Top Menu option.
The Pinned Investigations section of the Investigations menu now displays a link to the investigation.Investigation names on the Investigations menu are truncated at thirty characters. In addition, if you add more than ten investigations to the menu, a scroll bar allows you to browse the list.
- To remove the pinned investigation, you can click the vertical ellipsis menu and select the Unpin from Top Menu option.
Method 2 - Action Panel
From an investigation's action panel, you can click the thumbtack icon ![]() to the right of the investigation name to pin or unpin the investigation.
to the right of the investigation name to pin or unpin the investigation.
Deleting an Investigation
Only the owner of an investigation can delete it. Deleting an investigation removes it from the Investigations page and also from your system. Take care in selecting this option.
- From the Investigations page, locate the investigation you want to delete.
- Click the vertical ellipsis menu and select Delete.
The Are You Sure? window prompts you to confirm the deletion. - Click Delete Investigation.
Editing an Investigation
To edit the original parameters for an existing investigation, complete the following steps:
- From the investigation's evidence board, verify that none of the investigation nodes have focus.
- In the action panel, click the Edit Investigation button.
The Edit Investigation window is displayed.

- Enter your changes.
- Click the Save button.