Adding/Removing a Threat Object to the Evidence Board
Default ThreatQ Role: Administrative, Maintenance, or Primary Contributor
Custom Role - Action Permissions: Artifact Management - Investigations
You can create a new threat object or add an existing threat object to the Evidence Board. You can also remove an object from the investigation.
Creating a New Threat Object
When you create a new object from the evidence board, it is automatically added to your current investigation.
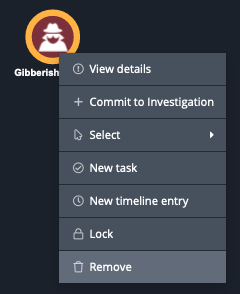
- Right-click the evidence board and select the Create Object option.
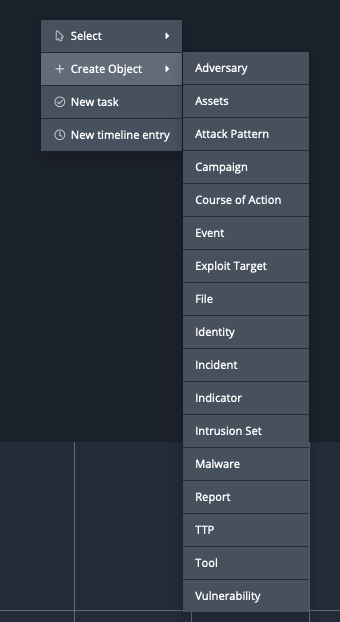
- Click the object type you want to create.
- Populate the corresponding object creation form.
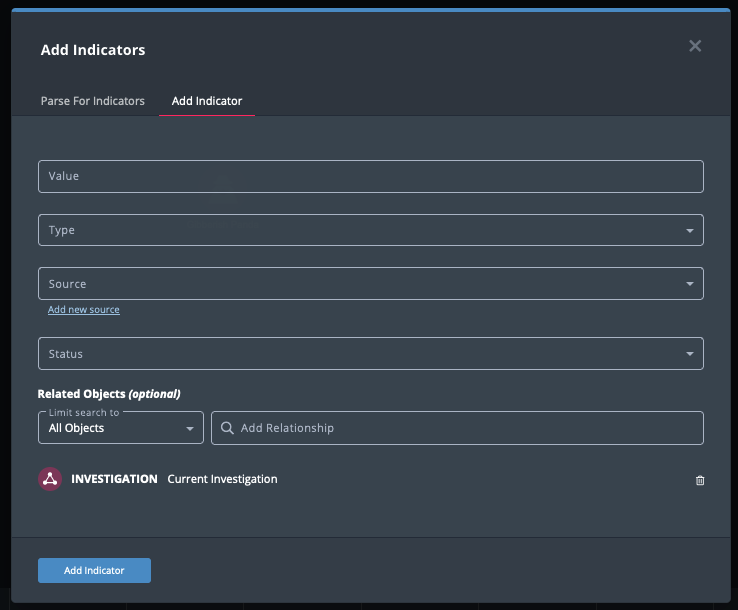
- Click the Add <object> button to save your entry.
The new object is added to your current investigation and is viewable by other users that the investigation has been shared with.
Creating and Linking a New Object
The Create Object And Link option allows you to create a new object and link it to object(s) on the evidence board.
- From the evidence board, select one or more nodes and right-click on one of the nodes.
- Select the Create Object And Link option.

- From the object type list, select the type of object , such as an Adversary or Attack Pattern, you want to create.
The add form for the object type is displayed.The Related Objects section lists all the nodes you selected in step 1. To remove a related object, click the trashcan icon next to the node.
- Click the Add <object type> button to save the new object and add it to the evidence board. The object will be linked to all the objects listed in the Related Objects section.
Adding an Existing Threat Object to an Investigation
The steps in this section relate to adding an object to an investigation with TQI. You can also add an object to an investigation from the object's details page. See the Object Details topic for more details.
When you add an object to the evidence board, it becomes available for further examination. However, it does not immediately become a part of the current investigation. You must explicitly commit the object to the investigation. Until you do so, only you can view the object in the investigation workbench, regardless of the investigation's visibility settings. After you commit the object to the investigation, other ThreatQ users that the investigation has been shared with can view it.
- Use the Evidence Board search menu to locate the object to add to the investigation.

You can also add an object to an investigation from its details page by clicking on the Actions dropdown and selecting Add to Investigation.
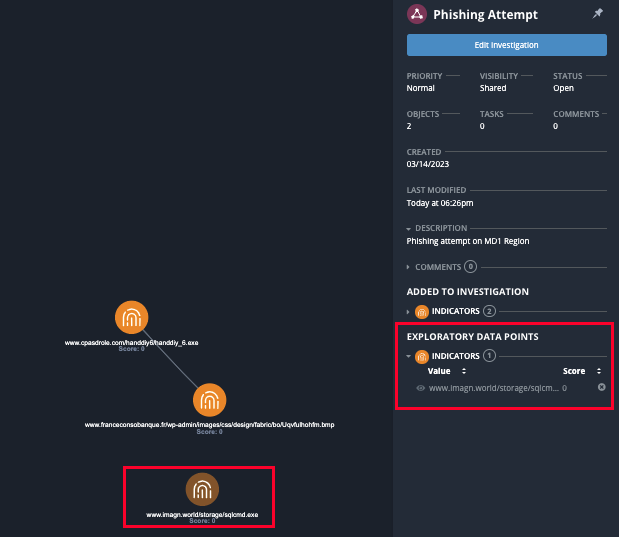
- On the evidence board, select and highlight the node that represents the object you want to manage.

At this point, the object node slightly darker than the other nodes and will appear as a Exploratory Data Point in the Action Panel. Other users will not be able to see this object in the invested until you have committed it.
- Right-click and select Commit to Investigation.

The object will now be committed to the investigation and can be viewed by other users that the investigation has been shared with.
Removing an Object from the Investigation
Removing an object removes it from the evidence board and your investigation, but not from the ThreatQ platform.
- On the evidence board, select and highlight the node that represents the object you want to remove.

- Right-click and select Remove.