Updating a TAXII Collection’s Publish Settings
Default ThreatQ Role: Administrative or Maintenance
Custom Role - Action Permissions: Data Exchange - Edit Data Exchange Feeds
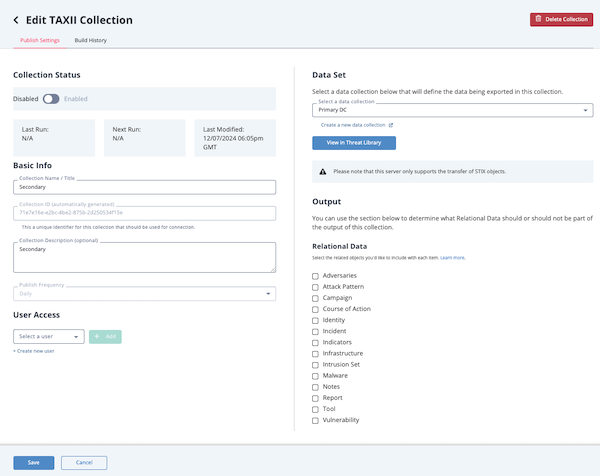
The Publish Settings tab in the Edit TAXII Collection page lists the collection’s configuration details, time/date stamps for the collection’s last and next run, and the date/time of the last change to the collection configuration.
| Field Name | Description |
|---|---|
| Last Run | The date/time of the last time the TAXII server pulled data for the TAXII collection. |
| Next Run | The date/time of the next time the TAXII service will pull data for the TAXII collection. |
| Last Modified | The date/time of the last updates to this collection including:
|
From this page, you can update the collection’s name and description, add or remove users, and change the data collection.
Updating a collection’s name does not change its collection ID. The collection ID is created at the same time as the collection and cannot be changed.
- From the TAXII Users & Collections page, click the gear icon next to the collection name.
The Publish Settings tab int he Edit TAXII Collection page is displayed. - Select the Publish Settings option to access the Edit TAXII Collection page. From this page you can:
- Enable/disable the collection.
- Change the collection name or description.
- Add/remove collection users.
- Select a new data collection
- Access the Threat Library view of the data collection so that you can review or update the objects specified by the collection.
- Select/unselect the related object types included in the TAXII collection.

- Enter your changes.
If you remove all users from a TAXII collection or delete its data collection, the TAXII collection is automatically disabled.
- Click the Save button.