Creating a Client Connection Bundle
Default ThreatQ Role: Administrative or Maintenance
Custom Role - Action Permissions: Data Exchange - Edit Data Exchange Feeds
As a publisher, you can create client bundles to add subscribers to your publisher instance. You can only create connection bundles for subscribers - a publisher cannot connect to another publisher instance.
Once a connection bundle has been created, you can send the bundle to the subscriber instance to connect - see the Connecting to a Publisher for more details on how a subscriber uploads the connection bundle.
The steps for creating your initial connection bundle when you setup your publisher instance and adding additional connections to functioning instance differ slightly.
Creating an Initial Client Bundle
Creating your first connection bundle can be performed from the Data Exchange initial landing page. This page will automatically load upon selecting the OpenDXL Set Up Server option.
- Click on the Data Exchange menu option and select the OpenDXL Set Up Server option.
The Data Exchange setup landing page will load.

- Click on the Setup Data Exchange button.
- Enter the name that will be used to identify your instance in the TQX node view.
This name will appear as your instance for the subscriber.

- Click on Next.
- Enter the name for the Data Transport.
This will be the local name you will see when managing your data transport. You can also leave the default value: OpenDXL Broker.

- Click on Next.
- Enter a Client Name for the subscriber.
This name will be used to identify the subscriber in the TQX node view.

- Click on the Create Credentials button.
- Repeat steps 7 and 8 to create additional bundles.
- Download the connection bundles that you have created using the links provided.

- Click on Finish Setup when you have finished creating your bundles and transfer the downloaded connection bundles to the subscriber instances.
In the event that you clicked on Finished Setup before downloading the bundle(s), you can download the connection bundles from the node view by clicking on the transport node. Connection bundles will be located under the Credential Management heading.
The node view will load with nodes for your instance and broker displayed. Once the subscriber has uploaded the connection bundle, created in steps 7-10, that node will also appear in the node view.
Creating Additional Client Bundles
Once you have created a client bundle, the getting started wizard is no longer available. You can create additional bundles from the Connections node view.
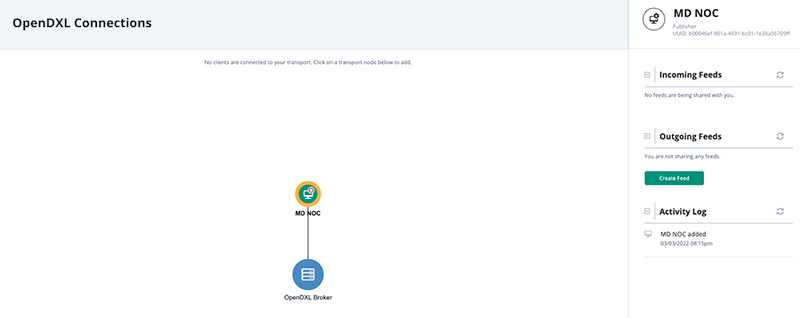
- Click on the Data Exchange navigation option and select Connections.
The OpenDXL Connections node view will load.
- Click on the blue transport node to load its details in the right pane.

- Click on the Create Credentials button located under the Credential Management heading.
The New Client window will open.

- Enter the new Subscriber’s name in the Client Name field.
This name will be used to identify the subscriber in your node view.
- Optional - The Hostname field displays the name of your current TQX instance, however you have the option to update this name.
- Click the Create Credentials button.
The new subscriber will be displayed in the Credential Management section.

- Click on the Connection Bundle link next to the new connection to download the connection bundle. Send this file to the Subscriber to upload via their TQX instance.