ThreatQ v6 - RHEL 9.4 Hardening Steps
ThreatQuotient provides the following steps to assist customers in setting up a hardened Red Hat Enterprise Linux (RHEL) 9.4 environment according to one of the supported hardening standards below prior to installing ThreatQ v6:
- CIS Red Hat Enterprise Linux 9 Benchmark v1.0.0 - Level 1 Server
- CIS Red Hat Enterprise Linux 9 Benchmark v1.0.0 - Level 2 Server
- DISA STIG for Red Hat Enterprise Linux 9 V1R2
It is very important that all steps in the guide are followed and all provided commands are executed. Once the deployment is complete, the VM will be running on a RHEL 9.4 OS hardened according to the selected standard. There is no need to run any additional scripts to further harden the VM. Please consult with ThreatQ Support if you have any questions about the process.
- Start a normal Red Hat Enterprise Linux 9.4 installation from the ISO.
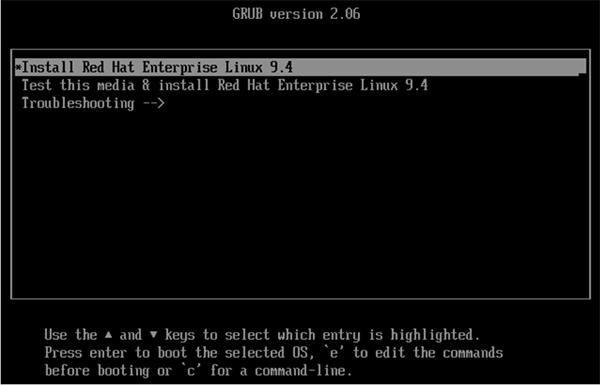
- Proceed through the installation until you reach the main options screen.
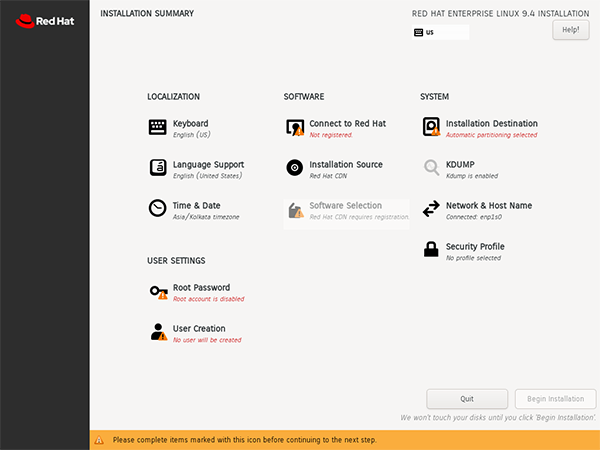
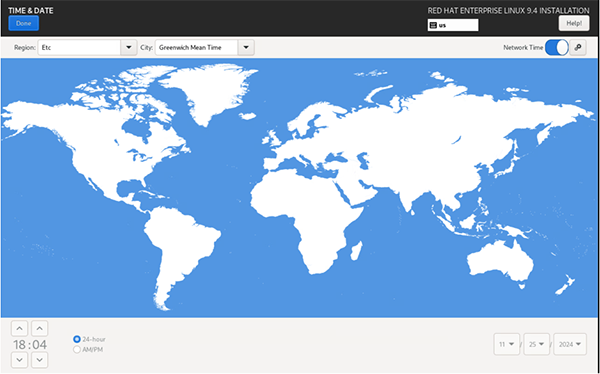
- Click Time & Date and select the Etc/Greenwich Mean Time timezone.
- To create a non-root user, click the User Creation option.
- Create a new non-root user to login to the VM later for installing ThreatQ.

- Enter a username and an initial password. You will be required to change this password on the first login.
- Make sure the Make this user administrator and Require a password to use this account boxes are checked.
- Click Done to save the settings and return to the main menu.
- Click the Root Password option to add an initial password for root. You will be required to change this password in a later step.

- Click Done to save the settings and return to the main menu.
- Click the Connect to Red Hat option, and register your installation with Red Hat.
- Click Done to save the settings and return to the main menu.
- Select the Security Profile option, which displays a list of available profiles.
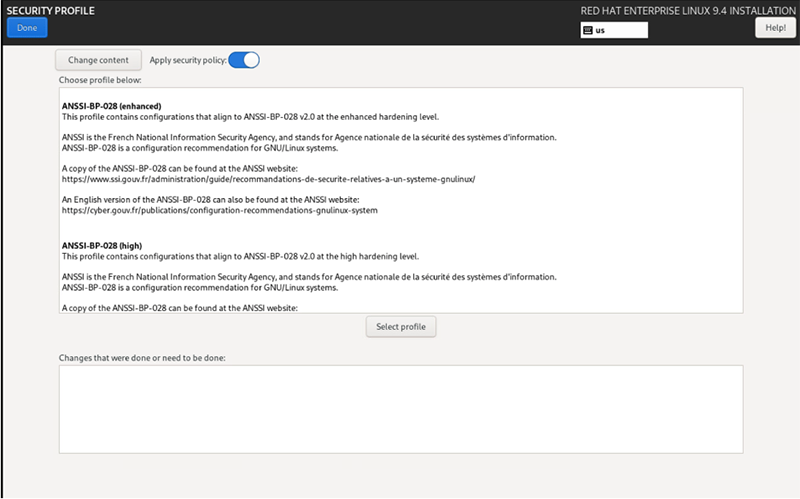
- Scroll down and select the hardening standard desired. Refer to the list of ThreatQuotient supported standards at the beginning of this document, as many of the standards supported by Red Hat Enterprise Linux 9.4 ARE NOT supported for ThreatQuotient installation. Click the Select profile button.
Unless you have already configured custom partitioning, this may initially result in a number of partitioning layout errors. CIS Benchmarks and STIG have partitioning requirements that are not satisfied by the automatic partitioning scheme in Red Hat Enterprise Linux 9. These will be addressed in a later step.
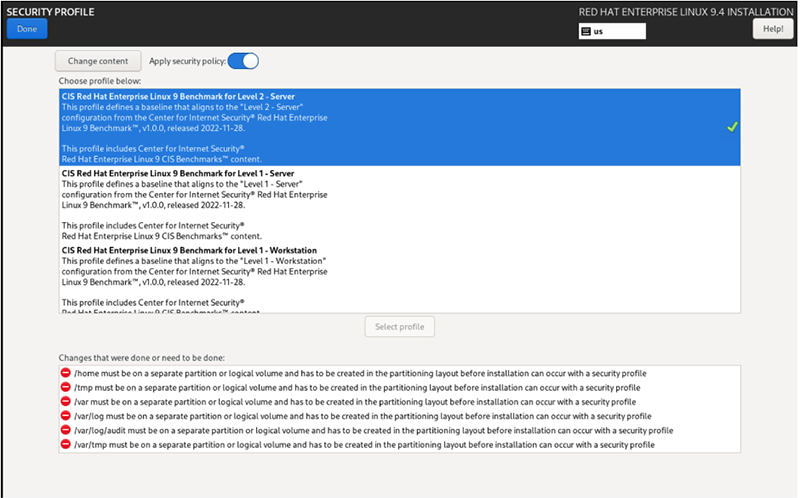
- Select Done and return to the main menu.
- From the main menu, select the Installation Destination option.
You will need to create a Custom partitioning scheme that satisfies the CIS Benchmark and the ThreatQ requirements. The required partitions are listed under the Security Profile screen.

- To create the required partitions, click the Installation Destination option from the main menu.
- Use the menu to partition the drive according to the required partitioning in the ThreatQ v6 Installation Guide.
In addition to the partitions in the ThreatQ Installation Guide, you will need to create a separate /var partition which is a requirement for the CIS Benchmarks and STIG.
- On the Installation Destination screen select Custom. Do not select anything else on this screen.
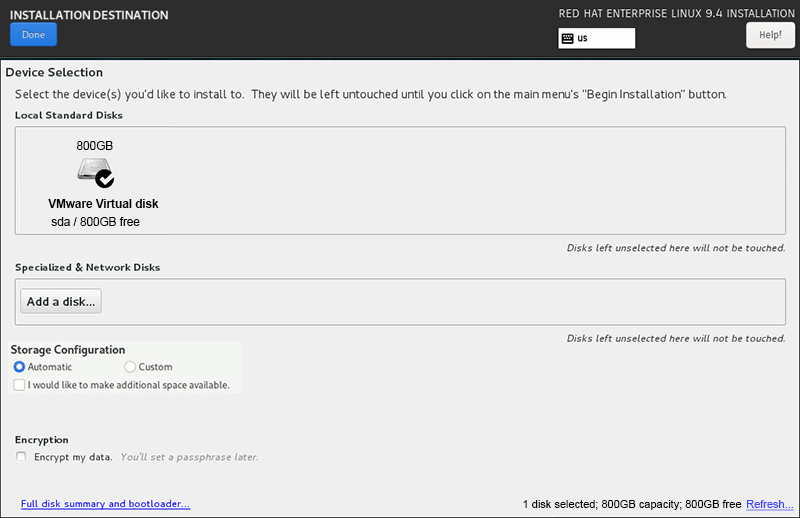
- Select Done to continue with the partitioning.
- To add a partition, click on the plus sign in the lower left corner.
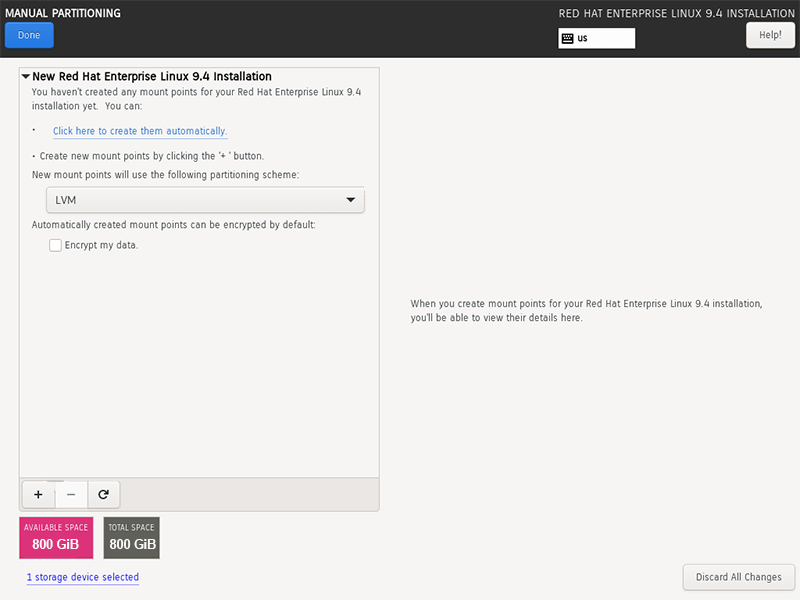
- Enter the partition path and the size.
- Click the Add mount point option.
- Continue until you create all required partitions.
The partitioning scheme and sizes needed may depend on both the hardening standard selected and the version of the ThreatQuotient software being used. Refer to the hardening standard documentation for any required partitions, and the ThreatQ Installation Guide for partition size guidelines.
- Click Done to save the settings and return to the main menu.
- Once you have created the partitions, click Done and then select Accept Changes.
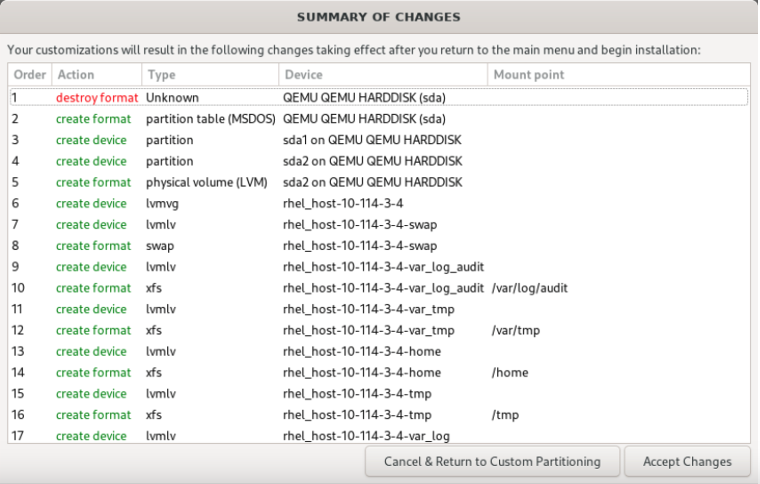
- Click Done to exit back to the main menu.
- After partitioning, select the Security Profile option from the main menu again.
The partitioning requirements should no longer be listed as red errors.
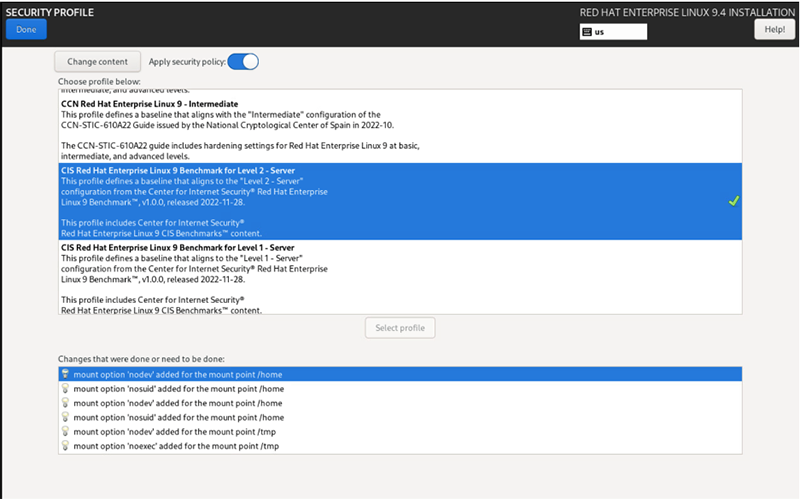
- Select other options as needed for your environment. The Security Profile should display “Everything okay”.
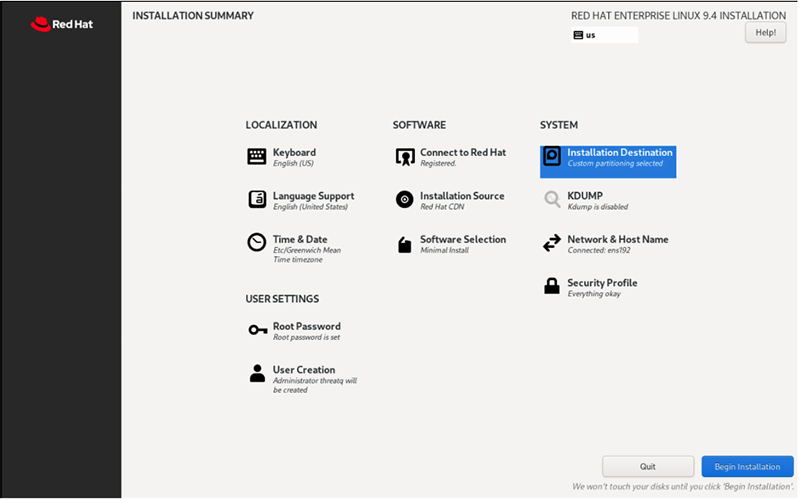
- Click the Software Selection option and select Minimal Install.
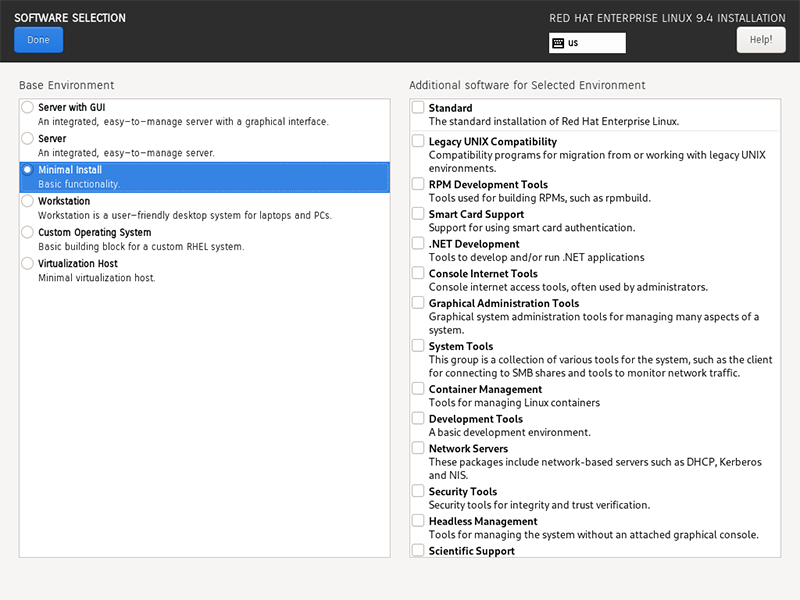
- Click Done to save your settings and return to the main menu.
- When ready, select Begin Installation.
When the installation finishes, the VM will reboot - After the reboot, SSH to the VM using the non-root user you created in step 5.
- After the initial login you will be asked to change the non-root user password. Enter the initial password you set up in step 5 and then enter the new password.
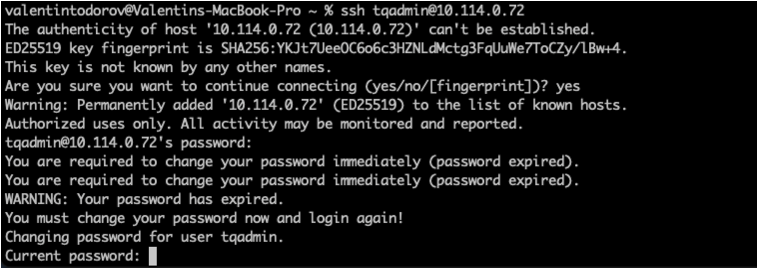
- After the password is updated, SSH to the VM with the non-root user from step 5 using the new password.
- Complete the following steps to install your SSH key:
- Create folder:
mkdir -p ~/.ssh - Create the file /home/<non-root user>/.ssh/authorized_keys and add your SSH key to it.
- Change the ownership and permissions of the file:
chmod 700 ~/.ssh/
chmod 600 ~/.ssh/authorized_keys
- Create folder:
- Update the root password:
sudo passwd -u root - Begin the ThreatQ v6 installation following the provided installation guide.